Home » ideas

Category: ideas

Brompton Ortlieb pannier hack

Brompton Ortlieb pannier hack

As a relatively new owner of a very new Brompton, I’m learning how adaptable it is for bike touring. The thing that’s taken a while to sink in is the nature of the bike means I have to do things very, very differently. Having spent the money on the bike, I’m trying to avoid getting gear that “only works” with the Brompton. I have plenty of good touring gear, especially my beloved Ortlieb classic backrollers. While I could easily purchase an expensive bag for the front bag block, I decided to see if I could find a way to use what I had and avoid the extra cost. This lead me on the quest for a Brompton Ortlieb pannier hack .

The basics

On the front of the Brompton, if one so chooses, is a Brompton bag block. Many accessories fit onto this block, from bags to baskets and more. It’s sturdily built and can handle officially or unofficially about 22lbs or 10kg. That’s plenty of carrying capacity for an Ortlieb backroller. The only trick is they aren’t designed to fit on the block… like at all. Sure Ortlieb makes a bag that does… several, in fact. But as I mentioned earlier, I’m looking to use what I have.  The good news is Ortlieb sells a bare bag rack so you can fit a bag of your choosing on the front block. The trick is… it’s shape is nowhere near the right size for the backroller. It’s too short and too wide for the way it needs to mount. For it to work, you’ve got to get a hackin…

It’s been done before… the hard way

I’m hardly the first person to come up with the idea. No, far smarter people have found a way to hack a Brompton bag frame to fit an Ortlieb pannier on the front block. I found this insanely clever guy from Mali and his solution. The only thing was it took patience, skills, tools and… well, you get the picture. The end result is amazing and well-crafted. Clearly something beyond what I wanted to do. Also, I was nervous about the process… he essentially drilled apart a perfectly good looking Brompton bag frame, and I was fairly sure I would just destroy mine, making the $30ish purchase a giant flush of decent money. No, I needed a better (if less beautiful) way.

The simple solution for my Brompton Ortlieb pannier hack

Drumroll… ten zip ties. Rather than tear the bag frame apart and get into rivets, I instead chose to use zipties to secure the frame to the rear hardware of the Ortlieb backroller. It worked like a charm. Why the overkill with ten ties? I’m under no illusion (or delusion) that zip ties are a proper load bearing device. However ten of them? I figure the tension distributed across that many gives me plenty of leeway and redundancy to survive a typical tour. Would I trust this on a six month expedition? Not without replacing some zip ties. but I think this thing is road ready. I’ll carry a bunch of spare zip ties to be safe though.

Brompton Ortlieb pannier hack
Lots of zip ties to distribute the tension and the weight.
Brompton Ortlieb pannier hack
Rear view
Brompton Ortlieb pannier hack
Front view, attached
Brompton Ortlieb pannier hack
Top view, attached
Brompton Ortlieb pannier hack
Side view, front bag

Pedalshift 2015 bike tours + podcasts

Looks like a few things are coming into focus for Pedalshift touring this season… I’ll be tackling two main tours this year, one to finally scratch an itch that needs it and the other a brand new adventure:

GAPmileage2

May 2015 – DC to Pittsburgh

My spring tour is “take two” on my abbreviated (some would say disastrous) 2014 attempt to through-bike from Pittsburgh to DC on the C+O Towpath and Great Allegheny Passage. This year, I’m going to try reversing my luck by reversing the route. I’ll be starting in DC and ending in Pittsburgh, taking Amtrak back in the wee hours of the morning. I’m adding an extra day into the mix to allow for more time to soak up the trails and document the trip more for Pedalshift. More on that in a second.

July 2015 – Erie Canal

fairportIf you’ve been listening to the podcast you might notice my New York tour plans have changed a bit. I’m now going to focus on the Erie Canal towpath, a very important piece of my childhood, having grown up a stone’s throw away from it in Fairport, NY. The timing shift is due to the happenstance of my girlfriend having a conference in Batavia, NY for a week in July, which takes care of easy transport to the region. My route’s a bit up in the air… I may head west to the Niagara Falls/Buffalo area, turn around and go back to Rochester to visit family and then turn back west to end the trip in Batavia, or I might just head east and explore the eastern sections a bit before heading back. Details to come on the route as we get closer to July.[footnote]This section has been edited since I made the decision in May 2015 to change focus from a partial Lake Ontario circumnavigation to the Erie Canal route. I intend to tackle the circumnavigation at a later date![/footnote]

Tour Journals Podcasts

tour journalsThe exciting news I want to share is I plan on podcasting these tours even more extensively than my Pacific Coast (aka Border to Border) tour of 2014. I’ll post a short audio journal entry at least once per day.[footnote]I hope to post more than once each day, mobile signal-willing. Of course there will be Twitter. Always Twitter.[/footnote] Rather than flood The Pedalshift Project feed with unusual shows, these will be on a separate Tour Journals feed. To get access to them, all you need to do is sign up for the free newsletter and you’ll get access to the feed and a special page where you can play the shows directly. I’m doing it this way to ensure newsletter subscribers are getting something extra and to ensure the more casual listeners to The Pedalshift Project don’t suddenly find their podcatchers flooded with the shows.

I also want to experiment with the Tour Journals show… taking questions from the road, maybe trying some live events and more. The idea is to take you along for the ride with me.

Other adventures

In addition to these longer tours, I’m going to be doing some day excursions while doing business in Paris (June) and Tuscany (October), plus some smaller overnights along the C+O throughout the touring season. Although not as bikey, I’m also going to be riding Amtrak from DC to Portland in late September, so I might be using that opportunity to document the Amtrak long-haul experience for those that are mixing that into their own bike tours.Amtrak train

I’m truly excited about my 2015 tour plans… I hope yours are shaping up as well. If any of you are including Washington, DC in your plans and would be interested in sharing your trip with the Pedalshift audience like Nathan did in Episode 018, please feel free to reach out and we can see if schedules can work out. I hope to make campfire interviews a regular part of the show going forward.

bike touring lifestyle

Making the best bike tour coffee

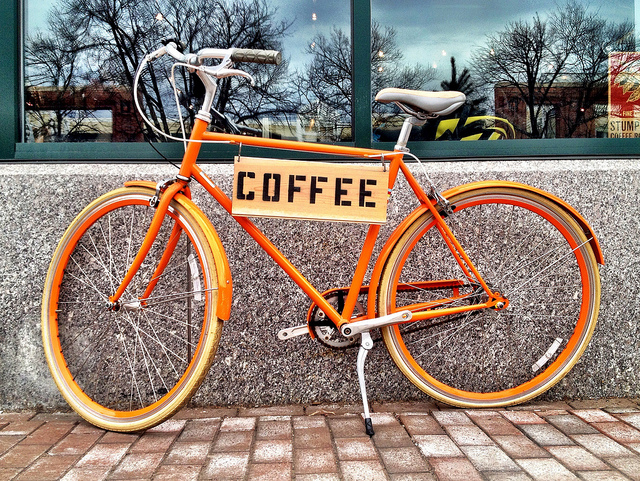
Coffee and biking go hand-in-hand. Coffee and bike touring? For some of us it’s a primary source of fuel. There are a kajillion[footnote]Technical term[/footnote] ways to make coffee while on bike tour, but if you really want to make the best bike tour coffee you, a little planning comes into play.

Not all are snobs

best bike tour coffeeNot everyone needs single origin, shade grown, city roast beans in order to enjoy their brew on bicycle tour. No, some coffee drinkers are happy with Brand X from a can, pre-ground and thrown into a drip maker. Most of us are somewhere in between. The most important starting point for knowing what to pack for your java needs is knowing your own standards. Some people are just going to have to go all out and create a cup that’s similar to one they’d make at home or ask from a barista. Others might find the fussiness more time than they want to spend before rolling. Know who you are and you’ll avoid the wrong end of the spectrum.

Instant coffee: no longer (necessarily) the devil

Many people older than a first-generation Macintosh (I’m looking at you fellow Gen-Xers) think instant coffee and immediately the phrase “flavor crystals” comes to mind, immediately followed by some combination of words like “ugh” and “awful” and “worst ever.” Instant coffee had a bit of a renaissance thanks to Starbucks and the technology they now sell as VIA instant coffee. Is it as good as a properly brewed cup of coffee? No. Is it reasonably close? I’d say yes. The traditional coffee giants have tried to mimic Starbucks VIA’s now familiar skinny packet, but word to the wise… it’s the same old stuff in it. I’ll be honest… on longer tours I choose the VIAs. I know me. I won’t brew a fussy cup of coffee on day 8 of a long tour.

In the quasi-instant category are pre-ground coffees that you dunk in hot water like a tea bag. In my experience I find they have a flavor profile similar to instant, perhaps a notch better. I know some bike tourists live on these. You can also rock some DIY and make your own with your preferred brand of coffee.

Advantages? Speed. Easy preparation.

Disadvantages? Oh wow. Flavor? Easy to pile on here.

Who should choose this? People who want fuss-free coffee on bike tour. People who usually use a Keurig and can’t find a tree to plug their machine into. I kid. Not really.

To grind or not to grind

hario grinderIf you make coffee at home and consider yourself at least medium snobbish, you probably make your coffee from freshly ground whole beans. That grinder may have a blade, or it may have a burr but it probably plugs into a wall and that’s unlikely to fly on bike tour unless you’re riding between hotels and B&Bs. If you’re just saying no to instant, you have two choices in this non-electrified existence… buy ground coffee or get a hand-crank grinder.

There’s nothing purely objectionable to pre-ground coffee to many drinkers out there. Objectively speaking, coffee beans are at their best when freshly ground, so pre-ground coffee is just not as good as coffee that’s been ground within a few minutes of brewing. That said, whole beans take up more space… and there’s that added issue of having to pulverize those beans into a usable format. That takes doing.

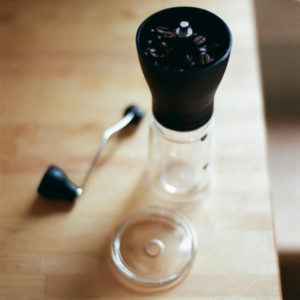
My hand grinder of choice is the Hario Slim Grinder. It’s light, small, and simple to use. It has the added benefit of being an adjustable burr grinder.[footnote]Burr grinders are superior to blade grinders because they produce a uniform grind size, which leads to better brewing.[/footnote] It takes several minutes of spinning the handle to produce enough coffee for whatever brewing process you choose, but if you’re a whole bean type… it’s worth it.

Preground advantages? Speedier coffee making; less bulk; easier to find everywhere.

Preground disadvantages? Coffee can go stale quicker; not as good as freshly ground.

Whole bean advantages? Objectively speaking, a better cup of coffee

Whole bean disadvantages? You have to grind it (duh); longer prep time; more bulk[footnote]There are a lot of people who don’t see the prep time as a disadvantage for whole bean coffee – grinding the beans by hand can be almost meditative. Most of these people would sooner drink battery acid than pre-ground coffee though. I have no link or scientific study to prove that, but c’mon… it’s wholly accurate.[/footnote]

Brewing methods

I’m going to highlight two ways to brew your coffee (fresh- or pre-ground). There are others, including french press, funky 1 cup espresso pots[footnote]I used this stovetop espresso maker in law school and I swear it made some of the best coffee… I’m sure it could be easily used on a campstove.[/footnote], and more.
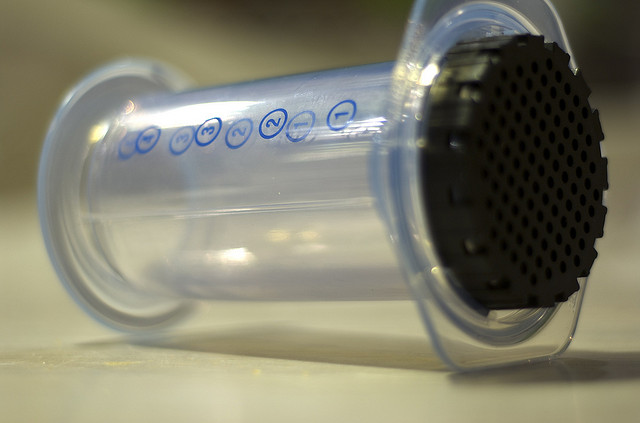
aeropress

Aeropress

The guy who invented the frisbee invented probably the best coffee maker in the history of coffee. No, for real. in addition to being cheap, portable and easy to clean, the Aeropress is practically built for bike touring. You can even store beans in the plunger and save some space. Think of an Aeropress as a french press with more pressure. The coffee is clean and generally on the strong side, depending on the amount of water you press through. I find it tends to cool quickly, so adding some additional boiling water right after pressing can up the temp to your liking as well as knocking down the burly strength of the brew. Or you can be like me and drink it fast and have another.
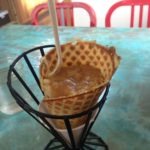
 

Pour over

pourover
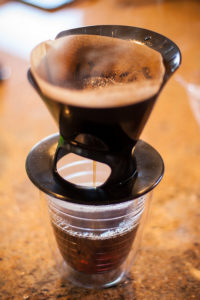
Simple and elegant, the pour over is another great way to make your java on bike tour. There are dozens of light-weight pour over cones, including folding models and silicone versions. You’ll want to be careful with how you pour the water over the cone – some people use special pots to regulate the flow in the kitchen, but on the road that might not be as practical. If you’re a pour-over person, your needs may vary and your gear will change with those needs.

image: (cc) boolean split on Flickr


The best bike tour coffee? Personal preference rules.

Aeropress is my preparation style of choice, but all of this revolves around personal preference. I tend to like really darkly roasted coffees… to me there’s a caramel sweetness to a well-brewed french roast bean. To others, that tastes “burnt” and I’m a lunatic for not liking their lightly roasted artisanal pour over. Personal preference rules the day. Get to know yours and you’ll be happier!

One quick note: with any preparation method involving ground coffee you have to deal with the spent grounds. If you’re camping, toss it in a proper bin or pack it out… no tossing them in the bushes declaring “natures compost.” It’s not meant to be there and while it will decompose eventually, it’s good stewardship to leave no trace.

Happy brewing!


kale chips

Dehydrating food for bike touring

If you’re touring on a bicycle, you eat. A lot. As a consequence, many of us carry the bulk of our weight in food. One of the ways to lighten your load is to choose food that’s lighter and less bulky. That’s where dehydrated meals and snacks come in handy – take out the water and you’re rolling with a fraction of the bulk. Unfortunately those pre-packaged “freeze dried” meals and snacks are not only expensive, but often have sneaky amounts of preservatives and other things you might not want to be taking in. A simple solution: dehydrating food for bike touring with a dehydrator.

Reminder – you don’t need a dehydrator

This might be an odd thing to say before talking about dehydrating, but you really don’t need to invest in a dehydrator to dry out a lot of foods. You can make dried jerky and other dried fruits in a toaster oven and do just fine. In fact, you may want to try that out before investing in a dehydrator – if you don’t like the prep work or prefer spending your time anywhere but the kitchen, you’ve just saved yourself a few bucks.

Dehydrating food for bike touring

Step 1: Get a decent dehydrator

I enjoyed learning a few things with toaster oven dehydrating, so I was ready to take the leap. I just got my first dehydrator and it’s been a real treat so far. The one I got was well-reviewed and not terribly expensive[footnote]The Nesco Snackmaster Express is about $80. Mine included 5 trays and a “jerky gun” which made better jerky than my oven dried version.[/footnote] I’d avoid any dehydrator that is sold via late-night infomercials… find out if friends have one and ask if they’d recommend, or do some searching amongst the reviews on Amazon and other places.

Step 2: Preparation is everything

Mandoline
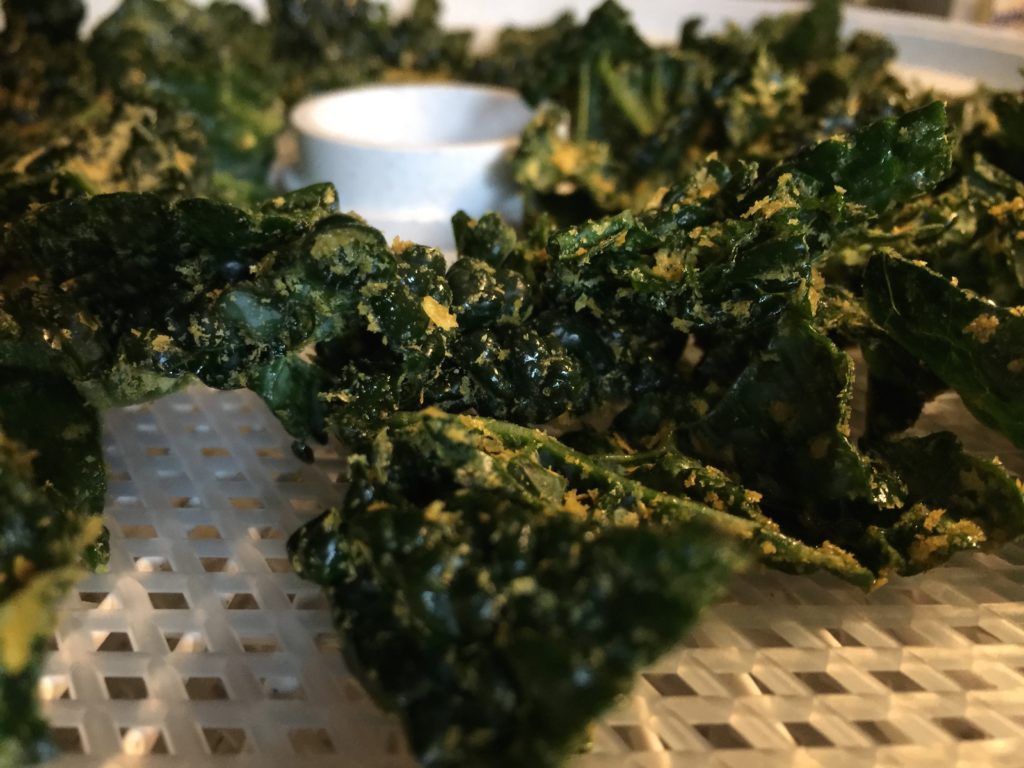
Do yourself a favor and read up on dehydrating the various foods you’re interested in preparing. You’ll find the temperature settings will vary tremendously between curing meats for jerky (high) and handling things like drying spices (low).

Once you know what you’re doing in that department, get ready to slice. If you plan on using a knife, be sure it’s a sharp one. It might be a decent idea to invest in a mandoline[footnote]There are a ton out there, but here’s a good look at one mandoline[/footnote] – that’s one of those gadgets that allows you to slide food over a sharp attachment to create uniform slices. I’ve been able to get away with a nice knife, but for large batches a mandoline would be a lot faster.

Step 3: Have something else to do

Dehydrating stuff takes a while. Making kale chips? It might only be a few hours. Making banana chips? See you in the morning. You’ll want to set it and forget it.

Dehydrating food for bike touring -- clementinesGet creative

  • Make that jerky, but it doesn’t have to be beef… it can be turkey or bison or something more exotic.
  • Remember fruit sugars intensify when dehydrated, so you might be able to replace some of those sugary gels and other pick-me-ups you might use on bike tour with dehydrated oranges or other citrus fruits. Better for you too!
  • Try using nutritional yeast on things like kale chips – it gives a nice cheesey flavor that compliments the crispiness of the kale. Bam! You got your veggies on the road!

In the January Pedalshift newsletter, I’ll have some of my favorite recipes… make sure you’re subscribed to get those so you can experiment a bit on your own. If you have any dehydrating experience, or a great recipe suggestion, I’d love to hear it and share it with the rest of the Pedalshift community!

Lake Ontario apples by bike

Dreaming up your next bike tour

It’s a balmy 25°F in Washington, DC and my ride yesterday across the Potomac River was a little chillier than I tend to like. It’s about this point in the season when I bike a little less and dream a little more about bike tours in the new year.

Dream first

My first priority when I think about the next bike tour is dreaming up trips, accomplishments or goals that I’d like to do by bike. Some are big — down the Pacific coast[footnote]Check – did that last year.[/footnote], across North America[footnote]Still to do.[/footnote] — and some are smaller — Pittsburgh to DC[footnote]Check – sort of. Need to do it all in one shot sometime.[/footnote], DC to Richmond, etc.

Find the right trip at the right time

2015 has already shaped up as a year with a lot of international travel that won’t afford me the time for longer bike tours. That means some of my bigger trips (I’m looking at you Crossing North America!) need to wait. What I do have time for next year are a week here or there. These are perfect for routes I’d like to tackle again like the 5-6 day Pittsburgh to DC on the GAP/C+O and a new one I’m itching to do: a 9-10 day trip circumnavigating Lake Ontario. Yeah, that’s fancy talk for going around the lake.

Start planning

I don’t need to do much work on the Pittsburgh to DC route (other than making sure I do it without exploding tires) but the Lake Ontario circumnav is new to me and requires some planning. So… to the Google machine!

A few resources I highly recommend when you’re charting a route you’ve never done before:

  • Crazy Guy on a Bike – someone else has probably done something close to your route and written all about it
  • Adventure Cycling Association – some or maybe even all of your dream route has maps and guides written by these folks
  • Individual blogs – This is where Googling your route is helpful: more and more people are discussing their bike tours on their own websites
  • Google Maps – Yeah, sometimes the bike directions send you on crazy logging roads when there are easier ways (cough cough Olympic peninsula) but the data Google has developed is a huge boon to planning.

For the Lake Ontario circumnav, I’ve found a few excellent resources. Google Maps does a nice plot.[footnote]Although with one of the ferries down for the season, it adds 300 miles… watch out for seasonality detours that might not apply when you’re planning to go.[/footnote] There are two old, but super useful CGOAB journals (2000 + 2002). I even found a commercial tour with a description that was super helpful for showing mileage splits. Oh and someone wrote a book on the route.[footnote]The Amazon reviews are a little unkind to the book, so I may hold off on it.[/footnote] This is a great start.

Pencil it in now

The hardest thing for me is roping off dates for the tour. I’ve found it’s substantially easier to make a somewhat arbitrary commitment well in advance and plan the rest of your life around those dates. It just so happens next May there’s a week when my girlfriend is leading a retreat out of the country and I don’t have any other commitments scheduled.[footnote]Last year we spent a lot of time apart, so I’ve decided to try to tour while she’s got plans to avoid more apart time.[/footnote] On top of that, my parents live on the route and – although they don’t know this yet – they can look after my dog Louis while I’m rolling. That week in late May is probably the best weather along the Lake too. Sounds like a plan… pencilling in the dates feels like the trip is really happening.

Add-ons

Now I’m dreaming up the possibility of inviting others to come with me, thinking about a charity/advocacy/awareness raising component, and a few other things that could make the trip even better. In the end, I may not add any of these things, but now’s the right time to think about it.

What are you dreaming up for your next bike tour?

sequoia at home

Shipping bikes with Amtrak Express — good or bad option?

Many bike tours begin or end with the need to transport your bike long distances. Depending on your needs shipping bikes with Amtrak Express may be an economical and effective option for you. I shipped my touring bike back across the US following a tour… how’d Amtrak Express do?

Answer

Amtrak did a great job shipping my touring bike home. See part one to see my thought process on why I went with Amtrak Express in the first place.

Details

Amtrak did a great job with the shipping.[footnote]I should mention, thanks to reader Kurt Werstein for pointing it out, that I never mentioned how Amtrak tells you when your package arrives.  They’re old school… no Internet tracking system for them. Shipping bikes with Amtrak Express? Don’t expect scan codes and automated arrival mechanisms. You receive a phone call. Sort of wish we could track when the box changes trains, but I suspect there isn’t a scanning system at all for packages.[/footnote] My bike arrived in excellent shape. You can tell a lot about the handling based on how dinged and dirty your bike box looks after traveling. With a couple of small exceptions the box itself was flawless. That gave me a good feeling as I unboxed, knowing there was a much lower probability of opening up a bad surprise.

Two things to bear in mind when considering shipping your touring bike by Amtrak Express…

  • Don’t expect the delivery forecast to be accurate, particularly if you’re shipping long distances. Shipping bikes with Amtrak Express means you need to have some flexibility. My bike arrived several days after the forecast. Amtrak trains are subject to the whims of Conrail and other heavy rail along certain corridors, so schedules are often hours late. That could mean missed connections. So, a corollary… don’t ship a bike with a need for a date certain. Amtrak will hold onto your bike for days after delivery (with a small charge for more than 2 days) so bake that into your plans.
  • Getting your bike at the station may take longer than you think. I expected to go to some desk and see my bike box somewhere behind the clerk. At DC’s Union Station at least, that isn’t the case. A couple of very nice Amtrak guys spent about 20 minutes in the bowels of the station retrieving the box. So, when shipping bikes with Amtrak Express don’t expect a quick trip when you pick up.
Shipping bikes with Amtrak Express -- Sequoia homecoming
Sequoia’s homecoming – that’s the Capitol dome in the background!

Shipping bikes with Amtrak Express — Conclusions

I like Amtrak an awful lot. The Amtrak Express service worked for me because of a lot of reasons I mentioned before. I suspect I won’t always use Amtrak Express over flying back with my bike, but given similar circumstances, I wouldn’t hesitate to use them again.

Have you ever used Amtrak Express to ship your bike to or from tour? Share with the Pedalshift community here in the comments!

amtrak bike box

Trying Amtrak Express to ship my touring bike home

Yesterday, I entrusted Amtrak with my prized touring bike, Sequoia (if you hadn’t learned I named the bike, check out Pedalshift Project 006), yet I’m not riding Amtrak back home. How am I doing this? Amtrak has a lesser-known shipping service I’m trying called Amtrak Express. Here’s why I went that route…

Bike box drought in San Diego

For whatever reason, the local bike shops (LBSs) were all tapped out of bike boxes from the shiny new toys they were selling. Nada. Zip. Zilch. First time I ever ran into that, and I called a bunch. That sort of precluded me from flying the bike back as United (or UnTied as I frequently misspell it on my iPhone) sort of insists on a box. Once I remembered Amtrak sold bike boxes ($15!) I went with them. Once I was there, I thought… hey, I can just give them my larger business!

Easier boxing

Never mind the fact I had an early morning flight and a rental car shuttle to handle. Ever try to lug a bike box on a bus? Yeah, no bueno (as the kids say). Amtrak boxes are a little special… you can basically roll your whole bike inside once you remove the pedals and twist your handlebars around. That is SO much easier than a “standard” sized bike box, trust me. One complication to “should I ship or should I fly” with an Amtrak box is it’s almost certainly oversized for airline dimensions… that could mean even more fees on top of the usual $75-$100 tacked on, so be aware that Amtrak boxes are awesome, but could cost you if you use it to fly as is.

No lugging

The best part of Amtrak Express shipping is you roll the bike right up to the ticket window and often can box up right there. That means a lot less lugging around. On the other end, it’s easy to pull the bike out and ride off.

Price for service

For $76 dollars, I was able to ship Sequoia all the way to DC with insurance of its real value. Compare that to airlines which pretty much think my gear is no different than the dude’s suitcase behind me in line. Don’t believe me? Read the fine print on the back of your ticket next time you fly. Disclaimers and liability limits abound.

Downside with Amtrak Express

BREAKING… rail takes longer than air. I’m halfway home right now on a layover, but I’ll beat the bike by a comfortable 3 days. Also, my bike will be delivered to Union Station in DC, not home. That means sometime on Thursday when the Capital Limited rolls into DC, I’ll need to trek over to get my prized bike. Not ideal. However, considering the delays and rerouting I’m getting on UnTied today (see what I did there? mockingly misspelling? ha!) I am beyond happy I won’t be having to shove a bike box in the back of a cab from (gag) Dulles versus my original destination of National Airport (long story… thanks to fog and UnTied).

Results

I’ll post an update here when I go and retrieve Sequoia. My hope is to take transit there and ride back… that puts a little pressure onto Amtrak to make sure the bike arrives undamaged, which frankly, is my expectation. Stay tuned…

UPDATE… check out the results here!

Amtrak Express Surfliner
Hey, it’s a train!

Border2Border Tour: Tour Journals x10

It’s hard to believe, but this tour crossed the 500 mile mark today, day ten of my travels from Victoria, BC to the California-Mexico border. Each morning I record a short tour journal… Follow along at soundcloud.com/pedalshift or keep an eye open on the @pedalshift Twitter feed. The Pedalshift Project will get a shiny episode of its own in a week or so once I cross the Golden Gate into San Francisco for a few down days. I the interim, check out the Pedalshift Tour Journals!