Home » gear

Category: gear

Bike Touring Gift Guide

Holiday Bike Touring Gift Guide

Just say no to the bikey pizza cutter. I mean, delicious, but no. This is a bike touring gift guide for the bike tourist in your life (hint: this might be you).  These are (almost all) things I personally use and love.

Bike Touring Gift Guide

Tent: Alps Mountaineering Zephyr 2 person ($125)

This tent saved me from a flood. Like, for real.

Sleeping bagHyke and Byke 32º down sleeping bag ($99)

A newer addition to my gear… works great and super affordable.

Ultrlight StoveEtekcity Ultralight foldable stove ($9.99)
Runner up: Trangia Spirit Burner alcohol stove  ($14.53)

Love the Etekcity, and the Trangia is a great value.

Lights: Portland Design Works Radbot 1000 ($29)
Runner up: Ascher USB rechargeable LED set ($13.99)

I swear by PDW as my rear light, and I just bought the Ascher set for Kimberly.

Bike Touring Gift Guide

Panniers: Ortlieb back roller classic (prices/colors vary)
Ortlieb front roller classic (prices/colors vary)

Look, there are a lot on the market. But Ortlieb stands the test of time for me. Plus: orange.

Dry Bag: Sea to Summit eVent Compression dry bag, large ($42.95)

I think this is one of the most clever items on the list… waterproof but lets air out for easy compression. I use the large size for sleeping kits, but all sizes are great.

Support the Parks: National Park and Federal Land Annual Pass ($80)

I ride the C&O a lot, and while there isn’t an entrance fee, this pass makes me feel like I support the system. Oh, it also lets me in all the others… which is nice.

Water Bottles: Brita Sport Water Filter bottle (2 pack for $16)

Filters built in make this a great way to help less than tasty water sources (it filters out iodine taste too for you backcountry types with iodine pills).

External Battery: Anker Astro E7 ($60)
Runner up: Anker Power Core 20100 ($40)

Anker is my brand for these.. get the biggest battery that makes sense for you.

Rain jacket: Showers Pass Double Century ($159)

Best rain jacket I’ve ever had. Looks nice too!

Tires: Schwalbe Marathon Plus (Price varies by size)
or
Schwalbbe Marathon Supreme (Price varies by size)

Nearly puncture proof, but more importantly, Schwalbe stands by their product with great warranties.

Tune up: contact your LBS (price varies by service)

Your bike will thank you.

Maps: ACA maps for a future tour (price varies)

For you paper types!

Stocking stuffers:

  • Freeze dried instant meals
  • Caffeine pills
  • Electrolyte pills
  • VIA Instant coffee packets
  • First aid kit
  • Tubes
  • Patch kit
  • Wool socks

For you big spender types… a touring bike: 
Brompton, Pedalshift Style from CelverCycles in PDX (Oregon has no sales tax!) or your LBS… (just no orange)
Runner up: Surly Long Haul Trucker from your LBS


FYI, some of these are affiliate links.

touring brompton

Touring Brompton specs: “The Pedalshift Touring Brompton”

<disclaimer> Ok, ok it’s not technically a Pedalshift Touring Brompton in the sense it’s, well… it’s not official from Brompton’s perspective. Like, at all. Ok… </disclaimer>

However… I’ve had a lot of people ask me the specs on the Brompton I recommend for touring, so I thought I’d finally share them here.

Pedalshift Touring Brompton specs

Build: M6R

Oh, you don’t speak Bromptonese? Yeah, me neither… in fact, I had to look this up again! M is for the style of handlebars… they lend to a mostly upright riding position, which I know goes against most bike touring dynamics, but on a Brompton, it’s better in my opinion. I did a bunch of research on this and it seems most people who tour on them prefer the M bars.

6 stands for the 6-speed variety. It doesn’t say it here, but get the -12% gearing (hi hills!). We’ll be doing one more thing later too, stay tuned.

R stands for rear rack. You’ll want this for carrying stuff and things.

touring brompton

Color: Orange

Horror of horrors, I learned from Anna at Clever Cycles that Brompton is suspending orange as a color for bikes in 2016! A true Pedalshift Touring Brompton would be all orange. Yours may have to not be, barring a custom after market paint job or Brompton changing it’s mind in 2017.

Phew! Orange has been restored in 2019… as Flame Lacquer. It’s straight up gorgeous. Drool-worthy, even.

Telescopic seat post

You may be the size of a small giraffe like our friend MJ, or you may be regular sized like yours truly. Either way, get the telescopic seat post for easier removal of the saddle while traveling.

telescoping post

Cushioning: Firm

The softer cush is too soft for handling with weight. Go firm.

Tires: Schwalbe Marathon

But, Tim! Rolling resistance! GRAMS!

Stop. Shake yourself. Say “Schwalbe Marathons.” You’re welcome.

Extras you probably want

Front carrier block

This gives you the option for any number of front bags, including ones you build or hack yourself using the Brompton luggage frame.

Brompton in SLO

Saddle bag & cover

I use these rarely, but when I do it’s in airports. Stealth mode is critical to get past some of the people that would stand in your way to overhead carry-on bliss.

stealth mode brompton

The key extra: ATS Speed Drive

This is a Clever Cycles recommended add on, and I have to say it’s pretty brilliant. ATS makes a gizmawahoo[footnote]technical term[/footnote] that effectively doubles your gears by effectively making a hub not unlike a double chainring. It’s an internal hub that is activated with a tap of the heel on the pedal crank. Remember when I said go for the -12% gearing? Well his helps to get you even lower at the bottom gear, getting you gear inches comparable to a standard touring bike. I’m here to say it’s awesome. I know Clever Cycles can do it… maybe your Brompton shop can too?

Maybes

Brompfication EZ wheels

I almost would leave this one off if you’re torn. I find the rubber “tires” come off a little too easily when the bike is rolled on things like, say, Parisian cobblestone. Perhaps my standards are a little high, non?

Saddle: Brooks

I’m on record as a person who can handle stock saddles. If you spend this much on a bike, many would argue putting anything less than the king (or queen) of saddles on it would be a disgrace. I’ll let you be the judge… I happened to get a Brooks for this one.

detach your saddle while flying with your Brompton

So… there you have it! The completely officially non-official Pedalshift Touring Brompton.

Interested in how I carry gear? Here’s the latest version from my 2018 GAP overnight and 2019 Florida tour…

Brompton Ortlieb pannier hack

Brompton Ortlieb pannier hack

As a relatively new owner of a very new Brompton, I’m learning how adaptable it is for bike touring. The thing that’s taken a while to sink in is the nature of the bike means I have to do things very, very differently. Having spent the money on the bike, I’m trying to avoid getting gear that “only works” with the Brompton. I have plenty of good touring gear, especially my beloved Ortlieb classic backrollers. While I could easily purchase an expensive bag for the front bag block, I decided to see if I could find a way to use what I had and avoid the extra cost. This lead me on the quest for a Brompton Ortlieb pannier hack .

The basics

On the front of the Brompton, if one so chooses, is a Brompton bag block. Many accessories fit onto this block, from bags to baskets and more. It’s sturdily built and can handle officially or unofficially about 22lbs or 10kg. That’s plenty of carrying capacity for an Ortlieb backroller. The only trick is they aren’t designed to fit on the block… like at all. Sure Ortlieb makes a bag that does… several, in fact. But as I mentioned earlier, I’m looking to use what I have.  The good news is Ortlieb sells a bare bag rack so you can fit a bag of your choosing on the front block. The trick is… it’s shape is nowhere near the right size for the backroller. It’s too short and too wide for the way it needs to mount. For it to work, you’ve got to get a hackin…

It’s been done before… the hard way

I’m hardly the first person to come up with the idea. No, far smarter people have found a way to hack a Brompton bag frame to fit an Ortlieb pannier on the front block. I found this insanely clever guy from Mali and his solution. The only thing was it took patience, skills, tools and… well, you get the picture. The end result is amazing and well-crafted. Clearly something beyond what I wanted to do. Also, I was nervous about the process… he essentially drilled apart a perfectly good looking Brompton bag frame, and I was fairly sure I would just destroy mine, making the $30ish purchase a giant flush of decent money. No, I needed a better (if less beautiful) way.

The simple solution for my Brompton Ortlieb pannier hack

Drumroll… ten zip ties. Rather than tear the bag frame apart and get into rivets, I instead chose to use zipties to secure the frame to the rear hardware of the Ortlieb backroller. It worked like a charm. Why the overkill with ten ties? I’m under no illusion (or delusion) that zip ties are a proper load bearing device. However ten of them? I figure the tension distributed across that many gives me plenty of leeway and redundancy to survive a typical tour. Would I trust this on a six month expedition? Not without replacing some zip ties. but I think this thing is road ready. I’ll carry a bunch of spare zip ties to be safe though.

Brompton Ortlieb pannier hack
Lots of zip ties to distribute the tension and the weight.
Brompton Ortlieb pannier hack
Rear view
Brompton Ortlieb pannier hack
Front view, attached
Brompton Ortlieb pannier hack
Top view, attached
Brompton Ortlieb pannier hack
Side view, front bag
flying with your brompton

Flying with your Brompton

A typical Brompton with a rear rack and ez-wheels is a great bike for touring or just using for transportation at whatever destination is on your itinerary. What’s amazing about them is they can also fit in the overhead compartment of most larger aircraft… meaning you can have your bike with you as your carry on. Here are a few tips you need to know when flying with your Brompton.

Download Pedalshift Project #34: Flying with your Brompton

#1 Telescoping seat post FTW

detach your saddle while flying with your BromptonThe telescoping seat post is a real help when you’re planning on bringing your Brompton aboard with you. It lets you easily remove the saddle without tools, making your Brompton more compact to fit into two important places – the carry-on luggage belt and the overhead bins of most larger planes. It’s not that you can’t do this with the standard seatpost, but it requires you to unbolt your saddle… kind of a drag if you can avoid it.

#2 Know your plane

You probably noticed I keep hedging on this… you can get your Brompton in the overhead bins of most larger planes. If your itinerary includes a regional jet, or worse, something with propellers… your Brompton won’t fit on board. You’ll need to gate-check it and that means it goes into the belly of the beast. A lot of times you get the bike back as you exit, but sometimes the airlines make you collect the bike at baggage check along with the masses. If you do gate check the bike, ask to get it right after you land on the jetway to be safe. Sometimes that works, sometimes that doesn’t.

Even if you know you’re on bigger planes with bigger overhead bins, sometimes the world conspires against you… it’s always best to be ready for gate checking. A $5 Dimpa bag from IKEA fits a Brompton like a glove and gives baggage handlers a handle. I also recommend using some velcro straps to ensure your bike remains folded. I had to gate-check my Brompton once because of the volume of carry-ons and the Dimpa bag worked great and the bike came through without a scratch or a dent. Pro-tip: tighten down the frame bolts so they are locked down. This minimizes the chance they can get jostled and break. If things go well, you’ll get the bike in the overhead bin and you won’t need any of this advice. If not, you’ve got it as a backup.

For the record, here are a list of jets with overhead bins that a Brompton fits based on personal experience:

  • Airbus A319
  • Airbus A330-300
  • Boeing 757-300
  • Boeing 737-800
  • Boeing 777[footnote]The overhead bins on newer jets like the 777 are the style where the whole bin drops down, not just the door. It makes for a heavy close with the Brompton in there and you may need to adjust it on the way up. It fit, but when I first boarded a 777 flight in June 2016 I wasn’t sure it was going to work![/footnote]

(there are way more, of course)

#3 Know when to roll em, know how to fold em

rolling Brompton at IADI learned this the hard way as a newbie in the airport so learn from my mistakes! The Brompton rolls like a champ if you have the easywheels and you extend the handlebars or saddle post. I prefer the saddle post for a little more stealth. Problem is when it’s extended and you need to lift the Brompton, it unfolds just when you least want it.

Pro tip – extend the saddle post when you roll, collapse it to lift. Like I did over there at Dulles airport on a trip to Italy…

#4 Stealth mode

stealth mode brompton
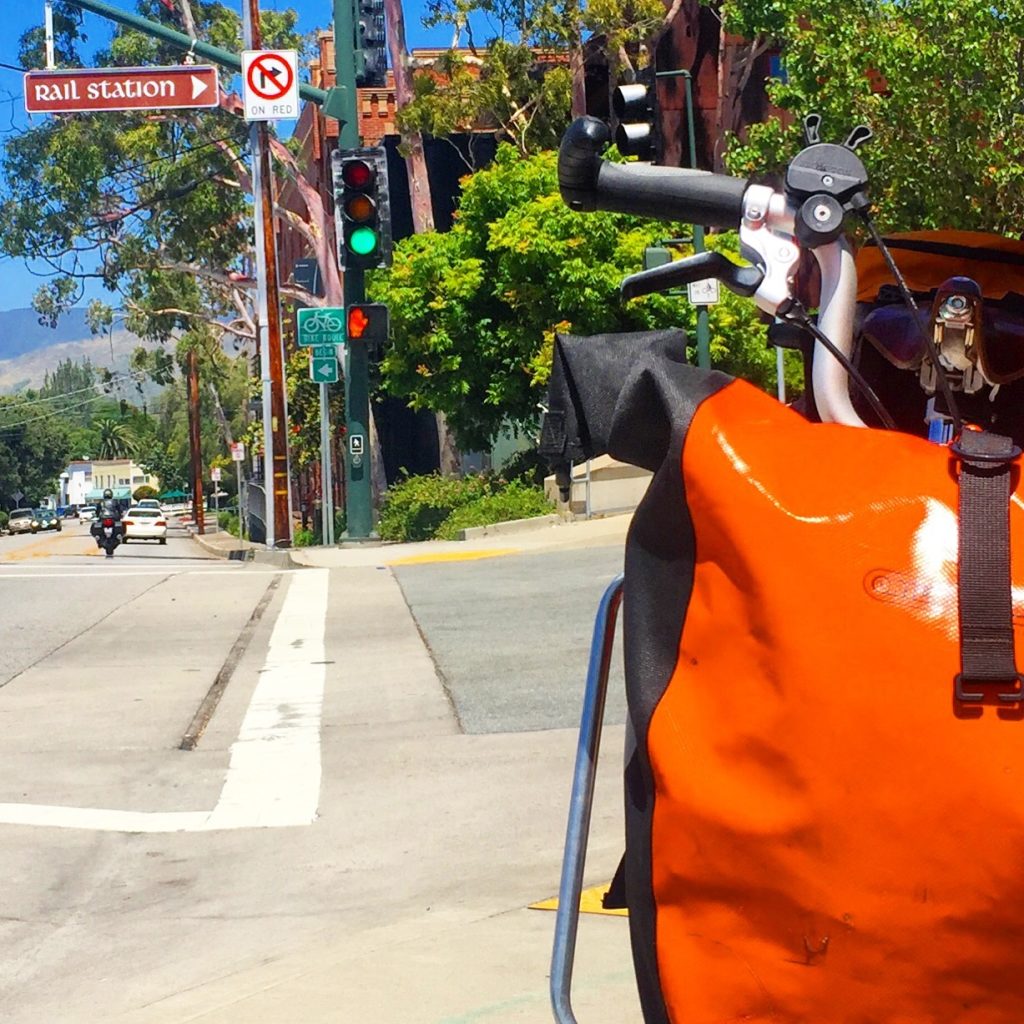
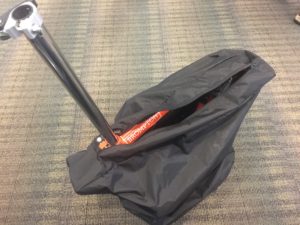
I prefer to keep the identity of my bike as secret as I can. It helps to avoid overly officious airline personnel from trying to tag you with a fee or require you to gate check. That’s why I love the Brompton bike cover. It easily slips over the bike and makes it look like an odd piece of rolling luggage rather than a super cool bicycle. I always have the cover on when I’m near the check-in desk and the gate.

Update 12/15/15 — Never has it been more clear that stealth mode is important than now.

Ugh. Wanna know how and why?

#5 TSA/security + boarding tips

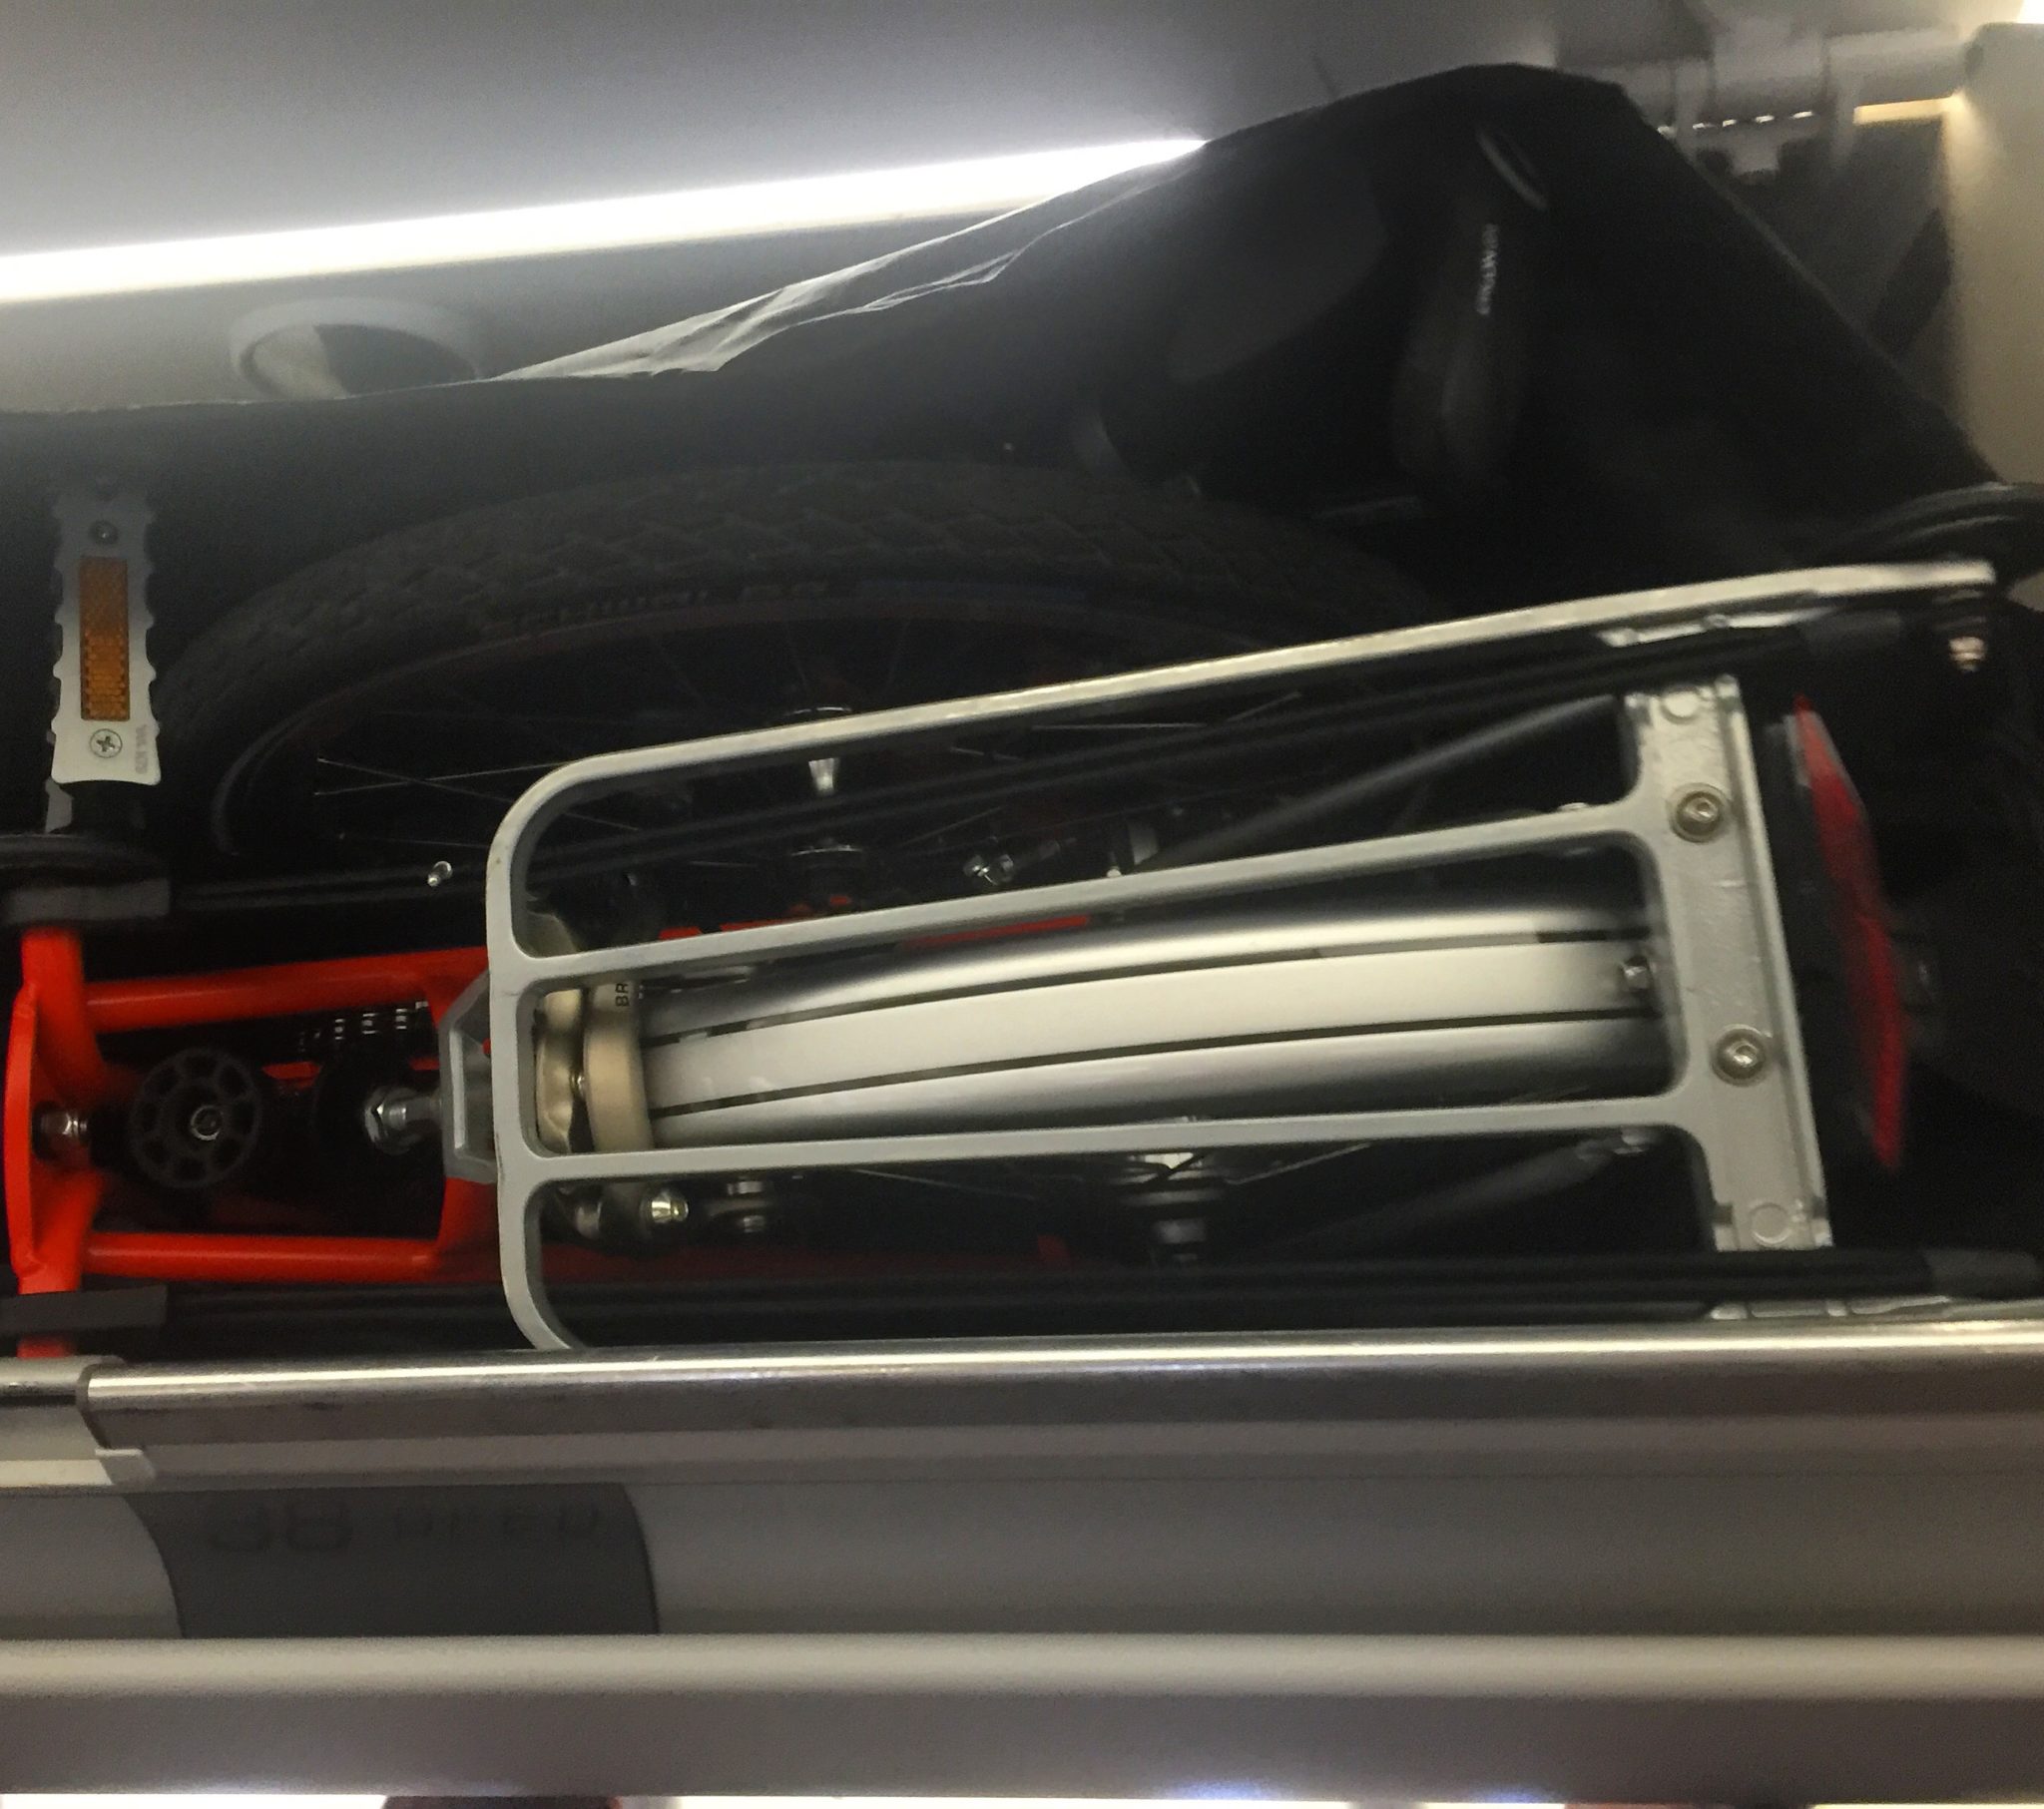
Ok, so you’re checked in for your flight, maybe checked your backpack or touring gear and you’re rolling to security. If you haven’t already, remove the saddle before you get too far in the line. Your Brompton is now small enough to go on the conveyer belt. It’s a bit of a dance to get your shoes off, and your other gear binned up but the bike’s pretty easy. Put it folding pedal side down and the shorter side facing the scanner. First time you do it, you’ll swear it won’t make it… but it does. Trust me.

Be prepared to have a security agent give you a knowing smile – the scanner gives away your secret pretty quickly.

Once you’re done with security, it’s best to get in position at the gate as soon as you can. Your best chance of getting your bike in the overhead bin is to be on the plane before as many people as possible. You know all those jerks who hover around the line waiting for their group to be called? Be that person this time.

Keep your cover on and roll your bike so you’re between it and the check-in attendant. This is the first of two human obstacles to the overhead bin, so stealth mode is pretty important here.

Once you get your boarding pass processed, keep rolling to your plane!

#6 Getting down the aisle and in the overhead

So you’re rolling down the jetway like a champ… now comes the tricky part. Collapse the seat post so you can lift the Brompton without inadvertently unfolding. Lift the bike by the top tube and make sure you give the flight attendant a big smile and a hello. On full flights most are trained to discourage larger roll aboards and encourage gate checking. I’ve run into a few that think my “bag” won’t fit. Being friendly and saying you’ve flown with it before and been able to stow it often works. This is where getting aboard early pays back big dividends.

Once past the flight attendant, it’s time to get to your seat and stow the bike above! I always keep an eye several rows ahead in case the overhead for my row is occupied. If it is and there’s a spot before, grab it. Worst case, keep looking past your seat for a spot in a bin toward the rear. It means waiting for everyone when you land, but better to be in the overhead than running out of space and sheepishly needing to gate check your bike after everyone’s boarded.

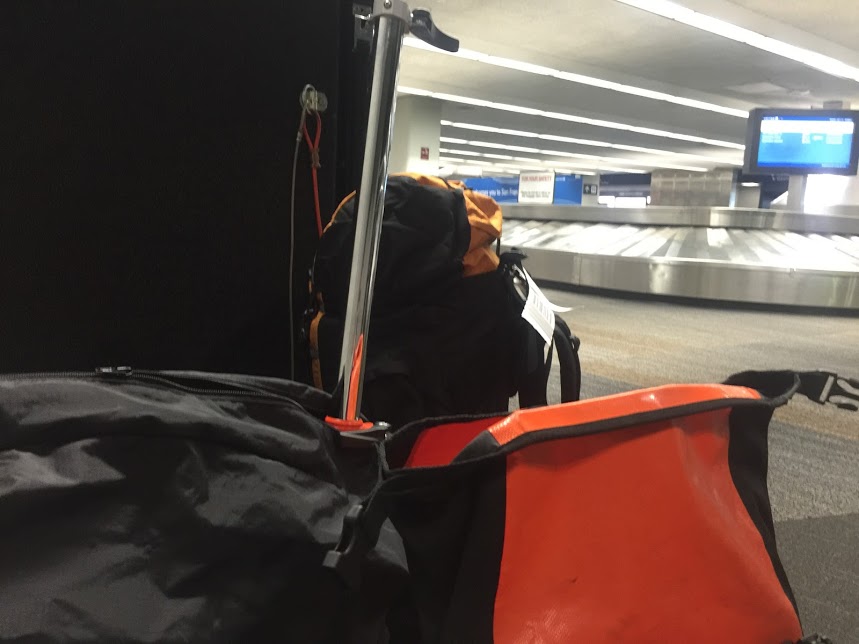
Congratulations! You’re flying with your Brompton AND you got it on as a carry on! Take that celebratory photo and impress your friends and family…

IMG_4638IMG_4640

dahon

My Favorite Touring Bicycles, Part 4: Dahon Vitesse D7HG

A recent question about my late summer 2015 transit-aided sprint from DC to Boston essentially turned out to be a decent review of the Dahon Vitesse D7HG.[footnote]Be sure also to check out reviews of the Surly Long Haul Trucker, hacking your own ride, and the Novara Safari[/footnote] I think it has a lot of good features for touring, although it’s best role is for commuting.

The Dahon review

I’m a fan of the Dahon, particularly the DH7 that I had. It’s best use is as a commuter because it can handle carrying a small bag with ease. I love the internal hub and its low maintenance, and I think it rides pretty comfortably, even on rides longer than your average commute. The downside to the Dahon is pretty much what you’ve mentioned… it’s a little heavy (trade off for the hub) and is geared for moderate hills at best. One other piece I haven’t mentioned is the handlebar gets a little wiggly at the folding point. The best analogy I can give you is it’s equivalent to the point when you’d wnat to tighten a loose headset on a traditional bike. Because it rides upright, it doesn’t feel unsafe, but it’s the one thing you find yourself needing to tighten every few rides. This bike is like the folding equivalent of the Novara Safari in that it comes standard with a ton of things you’d usually need to add… rack, fenders, etc. so there’s a bonus.

If I recall this bike is well below $1000 and you can even get it on Amazon. I wanted to buy it at a LBS but they discontinued carrying Dahons because they were selling for so much cheaper online. That may be the story for them in other places too. My preferred LBS has been able to handle maintenance on it without a problem though.

Second to last thing… Dahons are not easier/cheaper to fly with than a traditional bike. I tried all sorts of things to make it fit in a non-oversized checked bag and it just doesn’t fit. If avoiding flying fees is one of the purchasing notions, the Dahon’s not the right choice. I’m sure there are people who’ve done it (see the comments below for one example!) but the margins are really tight and you have to take apart things in a way that are tricky to re-assemble (for me anyways). I got the bike thinking it would be a snap to take it on a plane for $25 as a standard checked bag, but I found it was just a bit too big.

One last thing… I got the Dahon a year ago, passing on Bromptons and Bike Fridays because I wasn’t 100% sure I’d like or use a folder. One year later, I’m all in and getting a Brompton because I can travel with it more easily and it’s a better touring option. I don’t regret getting the Dahon, but if I were to do it over again (knowing what I know now) I’d get the Brompton first. Check out my experience flying with the Brompton and touring with the Brompton.

Conclusions

Overall, I really like this bike. There’s a newer version of tike (the Dahon i7) that looks quite similar. A few things I’d recommend adding on: a side mirror (I love this bar end one) and your lights of choice (I strongly prefer this one by Portland Design Works for the rear of all of my rides).

Is this better than a Brompton or a Bike Friday? Not for touring. But for commuting, it’s a really great bang for the buck that can handle some light tours as well.

dahon

dahon
“Loaded” bike, if you can call it that.

Want more?

There’s a whole series on my favorite touring bikes that I already mentioned, but you might also be interested in listening to The Pedalshift Project bike touring podcast. If you’re really into bike touring (new or not!) consider signing up for the free Pedalshift monthly newsletter for even more bike touring goodness. Also, if you’re into folding bikes, check out my experiences with flying with my Brompton.

marin mod touring bike at C+O

My favorite touring bicycles, part 3: A touring bicycle hack

So you want to get into bicycle touring but don’t have a “touring bicycle?” Fret not. Yeah, sure, it’s the most important gear you have on bike tour. But you don’t need something branded as a touring bike to go on a tour. Trust me. When I first started out, the only bike I had was a Marin mountain bike… with front suspension. I added a few things to it and it worked fine. In my series on my three favorite touring bikes we looked at my current personal ride, the Novara Safari, in part one. In part two, we ogled the arguably most popular touring bike on the road, the Surly Long Haul Trucker.[footnote]And the reviews keep coming… check out Part 4 on the Dahon Vitesse D7HG[/footnote] Now, let’s talk about my third favorite touring bicycle – the do-it-yourselfer touring bicycle hack you put together with a bike you already own.

You’ve got a bike: transform it with touring bicycle hack magic

How often do people delay things until they have the perfect set of gear? I can think of a lot of things I’ve held off on in life thinking I wasn’t prepared or didn’t have the right gear or experience only to realize taking the leap early is often far preferable than waiting for the alleged perfect moment. This is why I think people new to bike touring should just use the bike they already own to take the leap and get out there.touring bicycle hack

Can I hack it?

When you’re going out on a traditional bike tour, the name of the game is hauling gear. I’ve seen some people strap a backpack on with their gear, hop on a bike and roll. That might be your best option, but as anyone who’s done that can probably attest, it’s sub-optimal. Let’s try to have the bike haul the gear for you instead.

Add a rear rack

rear rack
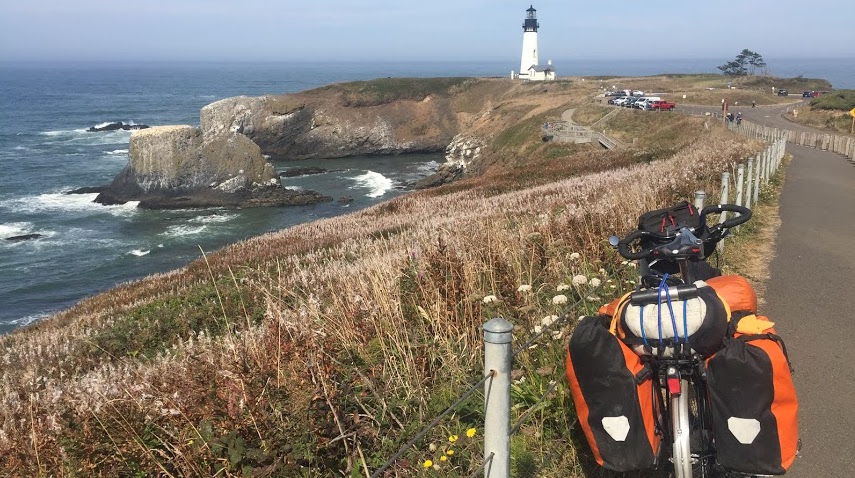
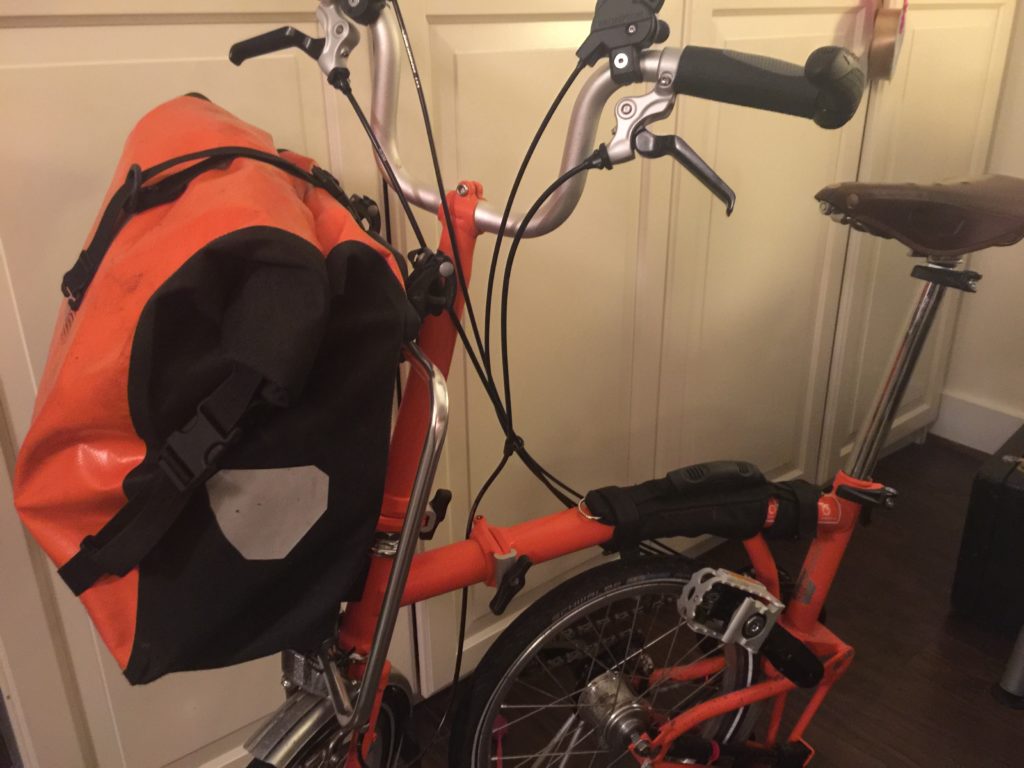
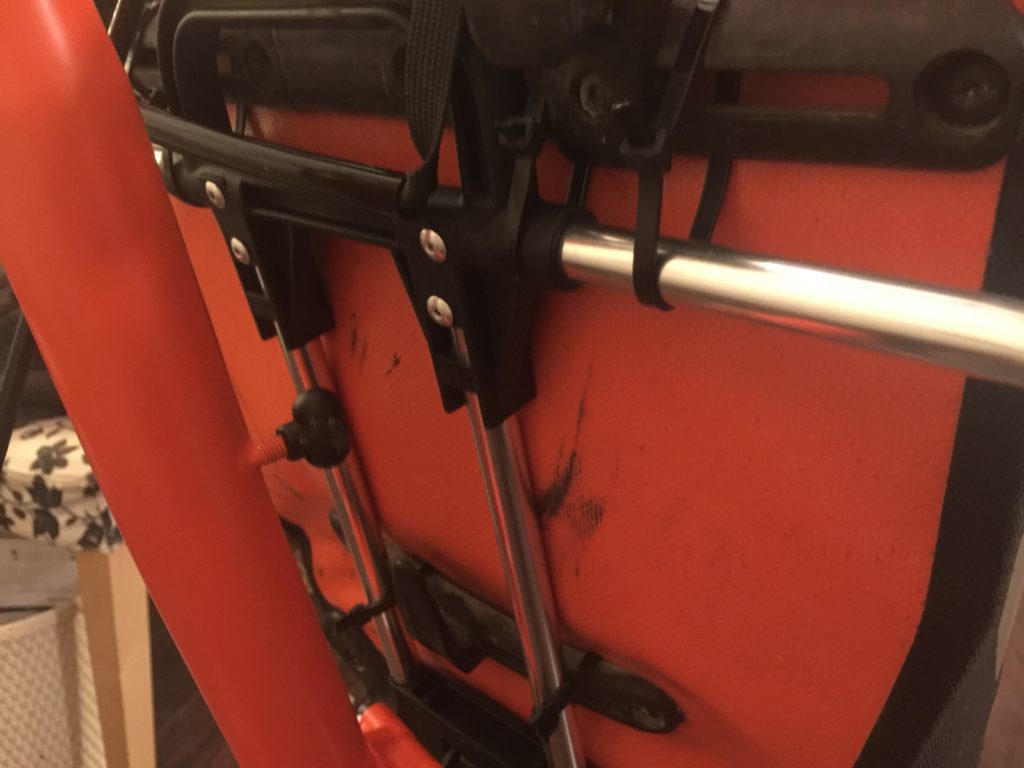
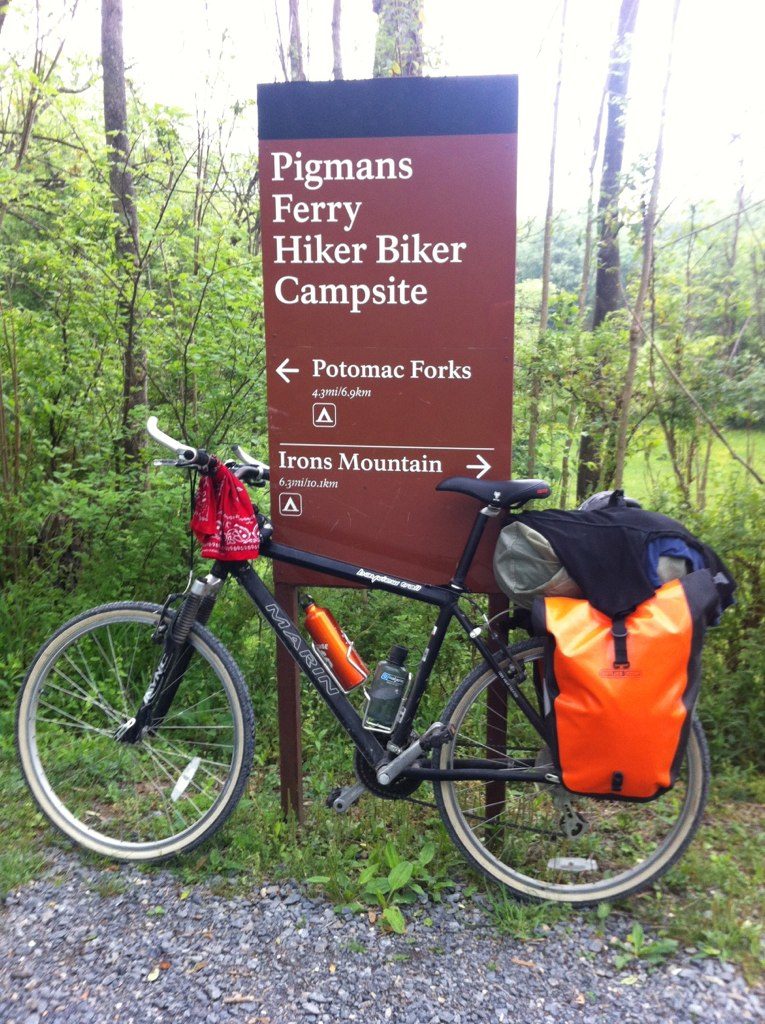
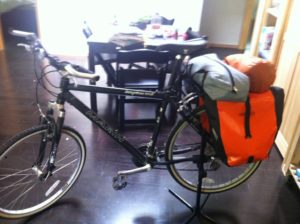
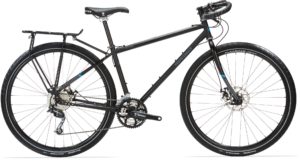
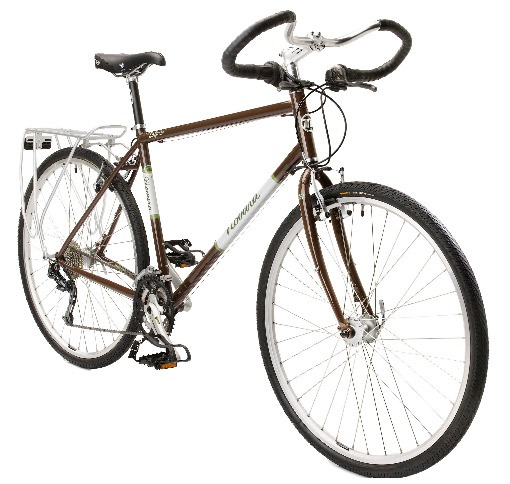
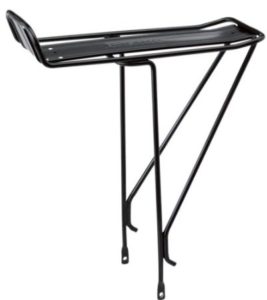
My old Marin mountain bike had the brazons that let me attach a simple, inexpensive rear rack. You don’t need anything fancy, but make sure the rack is attached well and has a reasonable weight rating. If you’re considering one of those clip-on rear racks (the kind that attach to your seat post alone) I’d recommend against that. They don’t hold enough weight unless you’re going ultralight. A decent $20 rack should do the trick, and hey… you might even have one in the garage lying about anyways!

Don’t have brazons to attach the rack directly to the frame? You can use P-clamps (check out this bikecommuters.com post on them) or (sometimes) hose clamps. Both of these are the secret tool for many a touring bicycle hack. The latter can scratch the hell out of your paint job, so be mindful of that.

Waterproof bags

old marin mod touring bike
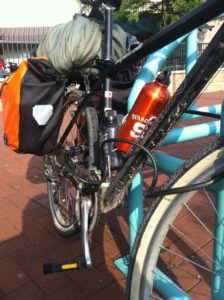
You don’t necessarily need fancy Ortlieb panniers (although they are nice). If you have a waterproof duffel, throw that on the rack and bungee it down. If you don’t have a waterproof bag, use whatever pack you have and throw it in a heavy duty garbage bag before you cinch it on the rack. Sure it won’t win any appearance awards, but we’re just going for function. Form can come later.
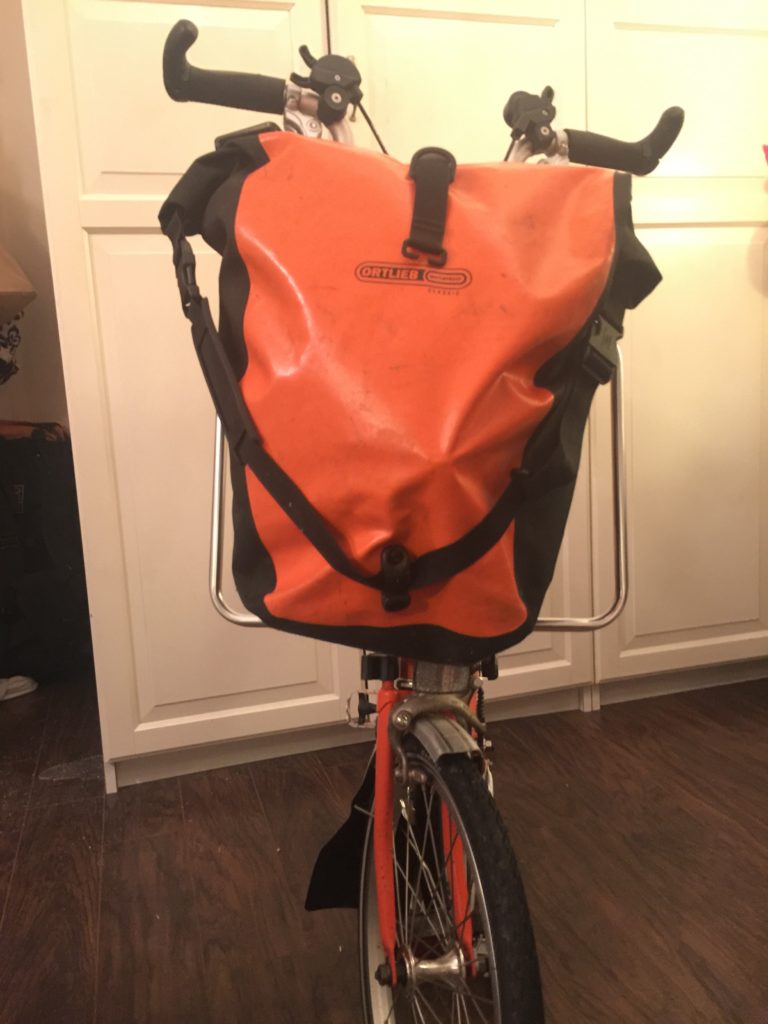


Bar ends

touring bicycle hack
Check out the bar ends on the old Marin.

If you have a flat barred bike (again, like my old Marin) a pair of bar ends are super helpful and a cheap mod to give you at least one alternative hand position. They come in all sorts of sizes and shaped (here’s just one example) and they’re often less than 20 bucks for a set. Play around with the alignment as you ride around. If you’re new to bike touring, trust me… this will be a great investment to avoid numb hands in the last hour of your first 50 miler!

Downside?

Some bikes just don’t tour well. If your bike is a big box store mountain bike or hybrid with plastic components, it might not stand up well to the rigors of a tour. That said, I’ve run into people on those bikes who’ve ridden hundreds of miles without a problem. Your mileage, as they say, may vary.

Heal strike can be a problem once you upgrade to rear panniers on your rack. You can shift them back as far as the rack allows, but you’ll find when riding a bike designed for touring that the extra length prevents that. For me, that was the big motivator to get the Novara Safari.

There may be other downsides specific to the bike you’re planning to transform with touring bicycle hack magic . My Marin had front suspension, which is really great for mountain biking, but a lousy feature when touring. The play in the front makes getting out of the saddle on a climb a little shaky. Stability on touring bikes (especially when loaded) is pretty important.

Bottom line

Don’t let having the “wrong” bike stop you. You don’t need to invest in a touring bike right away – you can spend a few bucks and modify what you already have and get that brand new touring bicycle hack out on the roads and trails. Refine your bike and your gear as you learn what feels right for you!

Want more?

There’s a whole series on my favorite touring bikes that I already mentioned, but you might also be interested in listening to The Pedalshift Project bike touring podcast. If you’re really into bike touring (new or not!) consider signing up for the free Pedalshift monthly newsletter for even more bike touring goodness.

surlysunset

My favorite touring bicycles, part 2: the Surly Long Haul Trucker

Behold your touring bicycle. Probably the most important thing you have on bike tour. Hell, it’s in the very name. Tents, cooking gear, toolkits, panniers and other things certainly make life easier on the road, but it’s the bike that gets the glory. When I was looking to upgrade from my heavily modified (non-touring) bike[footnote]for the record, a Marin mountain bike… with front suspension. Not recommended once you decide to make the leap, by the way.[/footnote] to something more built for the road, I spent weeks analyzing, hand-wringing and studying feature lists. In my series on my three favorite touring bikes we tackled my personal ride, the Novara Safari, in part one. This time, it’s arguably the most popular touring bike on the road… the Surly Long Haul Trucker.[footnote]I’ll lump in the Surly Disc Trucker in on this discussion as well… the main difference being rim vs. disc brakes. Demi-celebrity versions include Aaron of The Sprocket Podcast‘s Red Hare Among Horses.[/footnote]

Great specs + customizable


The Surly LHT is probably the standard when it comes to touring bicycle specs. Probably best of all, you can purchase the frame solo and build the bike from that beautiful steel up. For those that want a truly custom build without tossing “stock” parts aside, the LHT is a great way to go.

surly-long-haul-trucker

Favorite features

The first thing you notice with the Surly LHT is how damn solid it is. Most touring bikes of note are steel framed, but the build on virtually every Trucker you run into (and you run into a LOT of them on the road) is sublime.

But don’t take the ubiquity of Long Haul Truckers or their disc-bearing cousins as if you’ll run into a lot of similar looking ones. The fact they are so customizable and tend to be built to meet individual riding needs and preferences means you rarely run into a twin.

Downside?

It’s hard to find much about the Surly LHT to criticize. Ultimately, it’s pretty pricey. Is it the most expensive touring bike out there? No way, not by a longshot. But a typical build will be at least $1200 and often more if you go with the Disc Trucker variety. The more expensive your taste in tires and saddles, the higher the price climbs. Worth it? Yeah. Necessary? It depends.

Bottom line

I dig the Long Haul Trucker. It’s in many ways the ultimate touring bike, and I know a TON of people who ride and swear by them. My good buddy MJ really swears by his and has ridden many, many glorious miles on that bike.

Next time… part 3: Whatever the hell bike you have access to. Seriously. That’s part 3.

Want more?

There’s a whole series on my favorite touring bikes that I already mentioned, but you might also be interested in listening to The Pedalshift Project bike touring podcast. If you’re really into bike touring (new or not!) consider signing up for the free Pedalshift monthly newsletter for even more bike touring goodness.

grand canyon

My favorite touring bicycles, part 1: the Novara Safari (now ADV 2.1)

It’s hard to argue that the most important piece of gear you bring with you on tour is your bicycle. Sure we talk a lot about tents, cooking gear, toolkits, panniers and other things that make life easier on the road, but it’s the bike that gets us there. When I was looking to upgrade from my heavily modified (non-touring) bike[footnote]for the record, a Marin mountain bike… with front suspension. Not recommended once you decide to make the leap, by the way.[/footnote] to something more built for the road, I spent weeks analyzing, hand-wringing and studying feature lists. The next few posts will feature my three favorite touring bikes.[footnote]Be sure also to check out reviews of the Surly Long Haul Trucker, hacking your own ride, and the Dahon Vitesse[/footnote] This time, it’s my pride and joy Sequoia sempervirens… the Novara Safari.

Quick sidebar/updates

2015 safari

The news from 2016 Interbike was a gut punch for fans of the Safari… with the end of the Novara line of bicycles, the Safari did not survive the purge as-is. REI’s new line of bikes, called Co-Op (see what they did there?) did include touring bikes, and the great news is the new ADV 2.1 is pretty much an evolution of my beloved Safari. I’ll be doing a complete revamp of the reviews here since the ADV 2.1 is by all accounts the natural successor. Here’s a video from REI with the details:

Prior to the rebrand, the Safari was last redesigned in 2016. The stock model now comes standard with disc brakes and thumb shifters as opposed to the rim brakes and grip shifters of the one I ride. The tires are also now Vittoria rather than Continental. It seems like the new Safari is being targeted to touring that includes trails and gravel in addition to road work, which I think is a great space for it to reside amongst the REI bikes since the Novara Randonee occupies the classic drop-bar road touring slot. I’ll update the review when I get an opportunity to ride the new version. Onto the review of the 2014 model, which you may be finding more of on the secondary markets…

Great specs + bang for the buck


The Safari has a great set of specs, comes in a little cheaper than some of the other top bikes out there, and has the added bonus of being from REI if you are a member (that dividend covers some pretty sweet gear when it rolls in). Novara Safari

Favorite features

The first thing you notice with the Safari is the stock moustache handlebars. They’re distinctive, and maybe a little controversial. I strongly prefer them over traditional drop bars because of the variety of hand positions you can achieve with subtle shifts while riding. When I’m riding other bikes for more than a few miles, I tend to miss my moustache bars. They’re great for touring.

Another nice feature for the Safari is the very nice rear rack that comes standard. Is it a little heavier than other options out there? Sure. But it’s very sturdy and can handle a rough tour with few complaints.

Like many good touring bikes, the Safari has a steel frame, which makes it ideal for the rigors of travel. The components are solid, and with a few exceptions I’ll get to in a moment, I’ve ridden most of my tours on the stock parts.

While tour-ready once you roll it out of the store, he Safari is also highly customizable. There are brazons all over the frame for fenders, water bottles, pumps, and more. I even attached a rear rack modified as a front rack using some old water bottle cages and two hose clamps. It’s probably my favorite part of the bike.

A few downsides

While the components are excellent[footnote]three seasons of reasonably decent touring, approximately 3000 miles, and I am just now replacing the original shift cables[/footnote] I strongly recommend you break out the loktite before any tour and secure the threads on everything. It seems to be a problem for the Safari, and I definitely lost a few bolts in my first season.

The stock tires are Continentals. Decent tires. However… well, we all know what happened to mine. I moved up to a burlier tire.[footnote]The Schwalbe Marathon Supreme 28.0 x 2.0 tires fits the 700c wheels of the Safari. Highly recommended.[/footnote]

I promise I will not bore you to death by nerding out on gear ratios. There are way better sites for that. That said, the crankset that comes standard on the Safari is adequate, but not ideal for climbing hills. I found my ride down the Pacific Coast in 2014 to be substantially better when I swapped out the standard 48/36/26 triple for a 44/32/22 crankset. I love having that extra climbing ring, and the magic of physics kicks in with the smaller set. Bottom line: better climbing.

A minor quibble, and it’s more about personal preference: I don’t like to clip or strap in while touring. The Safari stock pedals have straps and I swapped those out after the first year. Like any strapped pedal, they flip over if you eschew their use and that can cause the foot holster to drag on the ground occasionally. I changed to an inexpensive platform pedal.

Bottom line

Ok, ok I’m biased. I love this bike. I ride this bike. Every once in a while I’ll see someone else riding one “in the wild” and I feel like a Mac user from the early 1990s who wants to connect with the other fan of a great, but lesser-used product.

Next time… the Surly Long Haul Trucker.

Want more?

There’s a whole series on my favorite touring bikes that I already mentioned, but you might also be interested in listening to The Pedalshift Project bike touring podcast. If you’re really into bike touring (new or not!) consider signing up for the free Pedalshift monthly newsletter for even more bike touring goodness.

touring this a-way

Five new things I’m glad I brought on this bike tour

I’ve written a version of this post a few times, but I find I’m constantly refining my “must bring” list for bike touring. This tour is no exception.

Flat power strip

I bought this on Amazon, but there are assuredly versions all over the place. It has two 3-prong outlets on each side and it’s been a total savior in situations where I would like to charge multiple devices and batteries, but I can only find one free outlet. Well worth the minimal space!

Caffeine pills

Spoiler alert: caffeine is a mood enhancer and a performance enhancer. Rather than suck down a soda or a Red Bull in the afternoon, I’ve had a couple of these with my normal hydration cycle and it has proven to make a great difference. Light, cheap and easy to carry… big fan for those afternoon hills!

Powdered Gatorade

I mix up two bottles of grape (the only truly great flavor in my opinion) every morning. Doesn’t matter if there isn’t a store or shop within 50 miles selling it, I have it always.

Ear plugs

I love the sounds of screaming children romping throughout campgrounds on summer weekend evenings. Oh wait, I don’t. Also good for morning raven ca-caws.

Verizon iPad

The rumors are true… it has better coverage. Ironically, I’m posting this using Sprint, which usually has the worst… but that’s because my Verizon doohickey has been the workhorse and is getting a charge right now!

Returning favorites

  • Wool sweater
  • Bandanas
  • Hat – good transition from helmet hair when going into the “real world”
  • Extra bungees
  • Dr. Bronners Soap – I use this for cleaning me, dishes and clothes. Totally indispensable. I prefer the peppermint.

Hey, don’t forget to check in @pedalshift and listen to the (so far) daily Pedalshift Tour Journals (subscribe to the podcast version here)!

lit alcohol stove

A DIY alcohol stove for your next bikepacking tour

A can of beans and a candle tin plus a few well-placed drill holes can earn you a super-lightweight and very affordable camp cooking solution while on bike tour.

For years I’ve used a trusty Coleman stove that uses those enormous green propane canisters as my bikepacking stove of choice. As I mentioned in past blog posts, there are sometimes things you like so much that you’re willing to adopt more weight and bulk.

Well, I may have changed my tune. That stove was huge:

coleman stove

It boiled water super fast, and those green propane canisters are easy to find and inexpensive. But, whoa with the huge. I needed a solution that maintained some of these pros, but shed some weight and bulk.

Enter the world of the DIY alcohol stove. Here’s the idea: high proof alcohol burs hot, relatively cleanly, and is super efficient from a weight to burn perspective. Plus, it stores easily in plastic bottles, evaporates quickly and cleanly if it manages to leak, and tends not to be as explosive as propane, butane… all your basic -anes. Denatured alcohol or even Everclear is a great option, but you can even use the yellow bottle version of Heet antifreeze, which is practically ubiquitous at gas stations and other stores in even the smallest of hamlets one bikes through (at least in North America).

Plus, you get to drill cans. More on that in a second.

There are all sorts of ways to make it work, but the most basic version is a stove made of a small can with some holes drilled in to allow air to enter the heated stove to mix with the vaporizing alcohol. Here’s what I did:

alcohol stove parts

I used a large can of beans, sawed in half with a metal hacksaw blade. I drilled in air holes that look somewhat random, but had more purpose than design aesthetic. I cut a hole in the top to allow the flame to come through to hit the pot (note: important). For the interior, I have an old alcohol lamp insert to create an interor wall which should serve to create more of a wind buffer while still allowing oxygen flow. Inside that is a small candle tin. I saved the top too so I can easily snuff the flame.

Here’s how it all looks together with the stove lit:

lit alcohol stove

This is the sturdy look with my cook-kit on top – note it has a really nice “seal” to it as the pot fits the can-top perfectly:

alcohol stove with pot

Most importantly, check out how nicely it all packs together. I used a plastic cover designed for keeping cans of opened cat food fresh to seat the bottom side and keep the internals together:

packed up alcohol stove

If you haven’t checked out Zen and the Art of the Alcohol Stove yet, do yourself a favor and check it out. If you’re at all a DIYer and into the idea of this, it’ll keep you entertained with ideas for hours.

More on the stove performance as I report from tour next week!