Home » ideas » Page 3

Category: ideas

busted bike

Emergency roadside bike repair tips

Every once in a while I read a list of tips that I feel like I need to share… today these emergency bike repair tips come from the Community Cycling Center in Portland, Oregon (the birthplace of my west coast ride, The Goblin). Some of the highlights:

  • A tire lever alternative you probably have on your bike already
  • An emergency option for a punctured tube when you’re patch-kit-less
  • A $1 emergency solution for a torn tire

And much more. Totally recommended… read more at the CCC’s blog. A hat tip also to an older post from Cyclocamping – check their roadside repair tips out too.

dirty bike

Spring cleaning: how to wash your touring bike

Does your bike still have the grime from last season’s tour? Have you hit the trails already and muddied up your chariot? Here’s a great video by Clint Gibbs showing how you can clean your bike in about 15 minutes without disassembling it:

Clint also has a part two, which is worth a look. A few thoughts:

  • I tend to be a little more careful when using a hose… as mentioned in the video, direct spray into a bottom bracket can get water into the bearings. The same is true (at least in my unfortunate newbie experience a few years ago) with wheel bearings. Water under pressure has a sneaky way of finding its way into those spots, and it makes your life miserable on tour. Trust me.
  • Chain cleaners are your friends. You might not need to do the full hose-down… just the drivetrain. I’ve been a big fan of Park Tool’s chain cleaner (FYI, affiliate link)for a few seasons, and use it as needed. It also includes a gear brush which is super helpful on deeper cleans. More coming on drivetrains next week. I’m taking a maintenance class Thursday and hope to share a few things.
  • Remember to lubricate what needs lubricating after the wash. Obviously the chain, but sometimes you’ll need to give the brake and shift lines a little bit of help.
  • Don’t be afraid to do this on the road. Maybe you’re taking a zero-mile day? Maybe you hit a huge patch of mud or a dusty run. The less grit in your gears, the smoother and more efficient your ride, plus the less wear on your (maybe expensive) components. Cue the people with the internal hubs who don’t worry about such things nearly as much!

photo credit: Ryan Cousineau on Flickr
bottom mount of front rack

Hacking a rear bike rack as your front rack

An extra rear bike rack just became my new front rack without much effort or extra hardware. But is it good enough for carrying some of the load next tour?

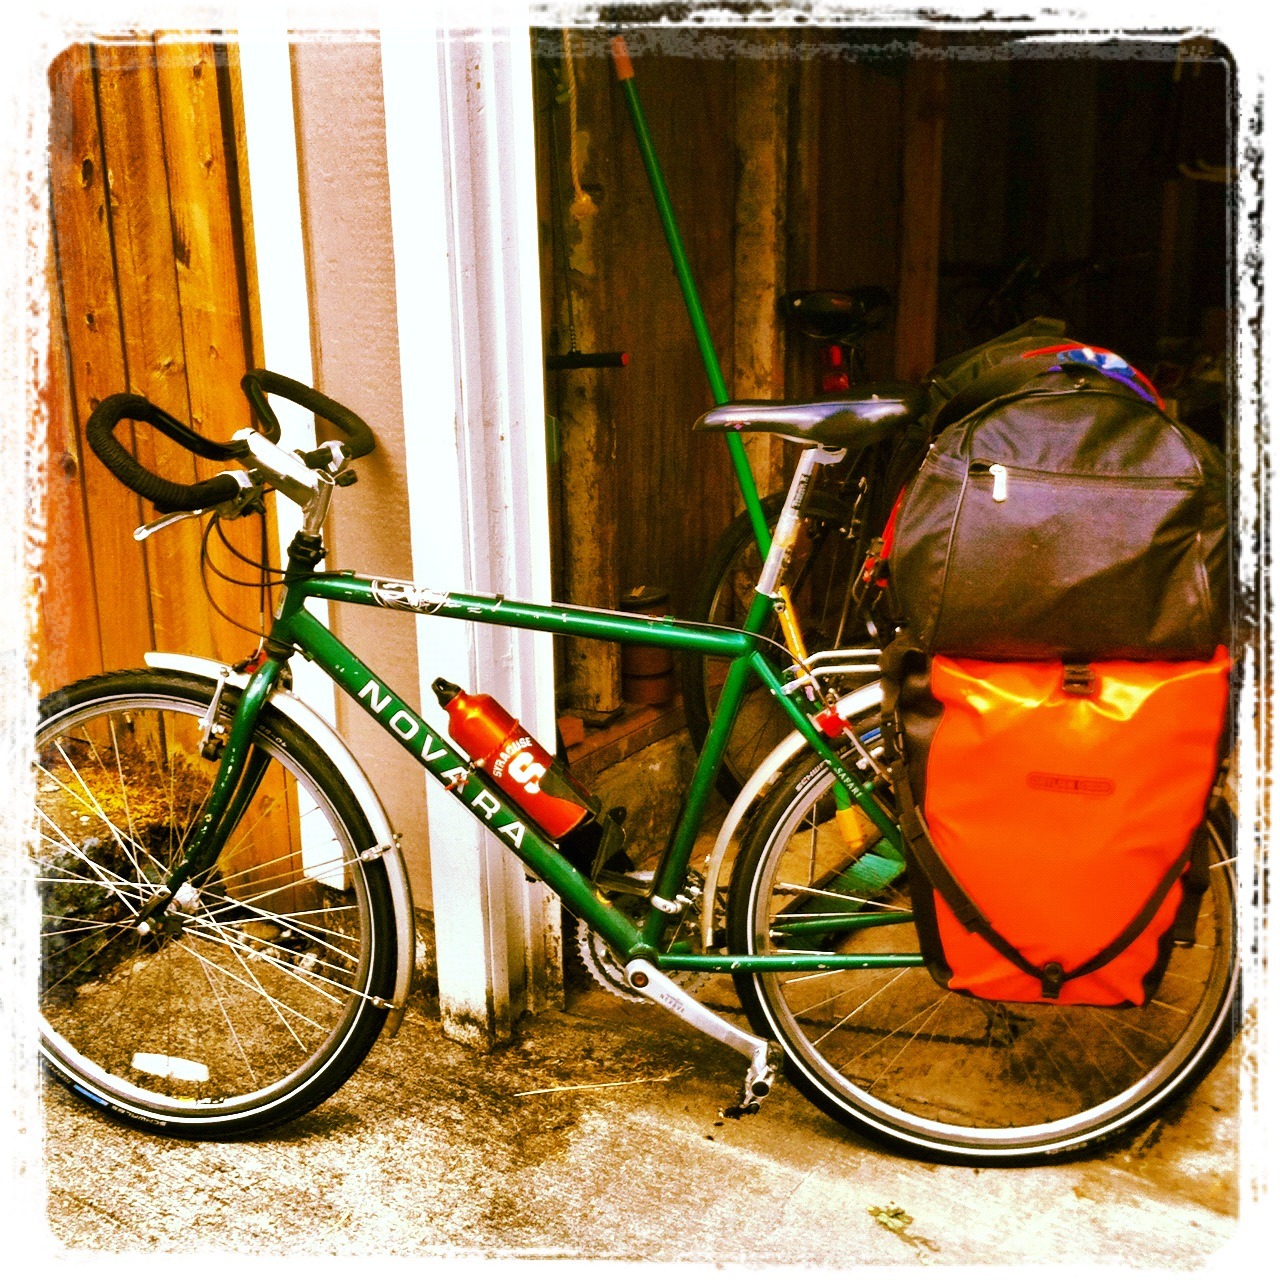
A little background: For some reason, I’ve resisted carrying anything but a handlebar bag on the front of my bike. I think it’s because I’m worried the extra capacity would cause me to overpack, but I’ve slowly warmed to the idea of distributing more weight on the front and less on the back. It might be because I carry a metric crap-ton* of weight on the back of my typical tour:

on tourIt’s time to take advantage of physics and common-sense and redistribute some of that up front.

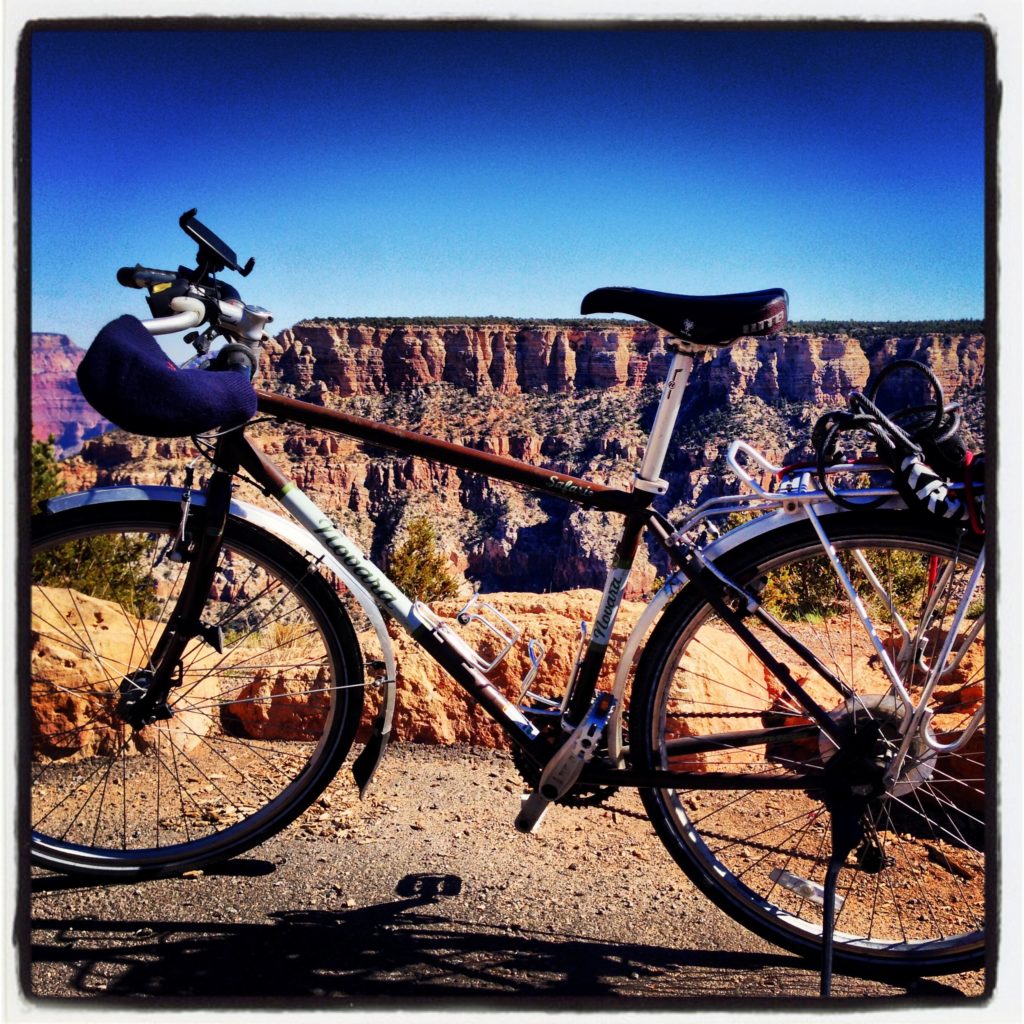
It just so happens I have an extra rear rack lying around. Nothing too fancy, just a $20 Avenir rack that’s tested to 25 lbs when mounted on the back. I’m not too cheap to buy a “real” front rack, but after doing a little research, I saw many people (mountain bikers in particular) use platform racks and even reuse those rear racks up front. So, I decided to give it a whirl. Here’s what it looks like:

rear rack mounted as front rack

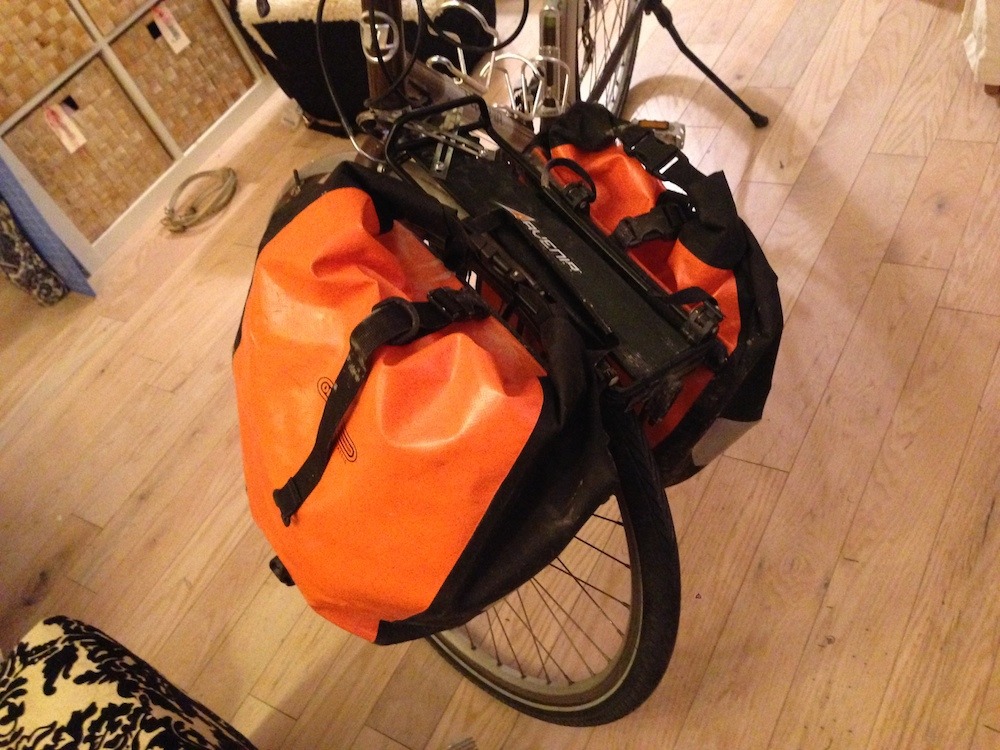
The rack faces inwardly, just as it does on the rear. I have two panniers hanging on it in this picture mainly to demo what it could look like… these are Ortlieb back rollers, so they’re a bit bigger than your typical front bags.

rear rack mounts at upper fork

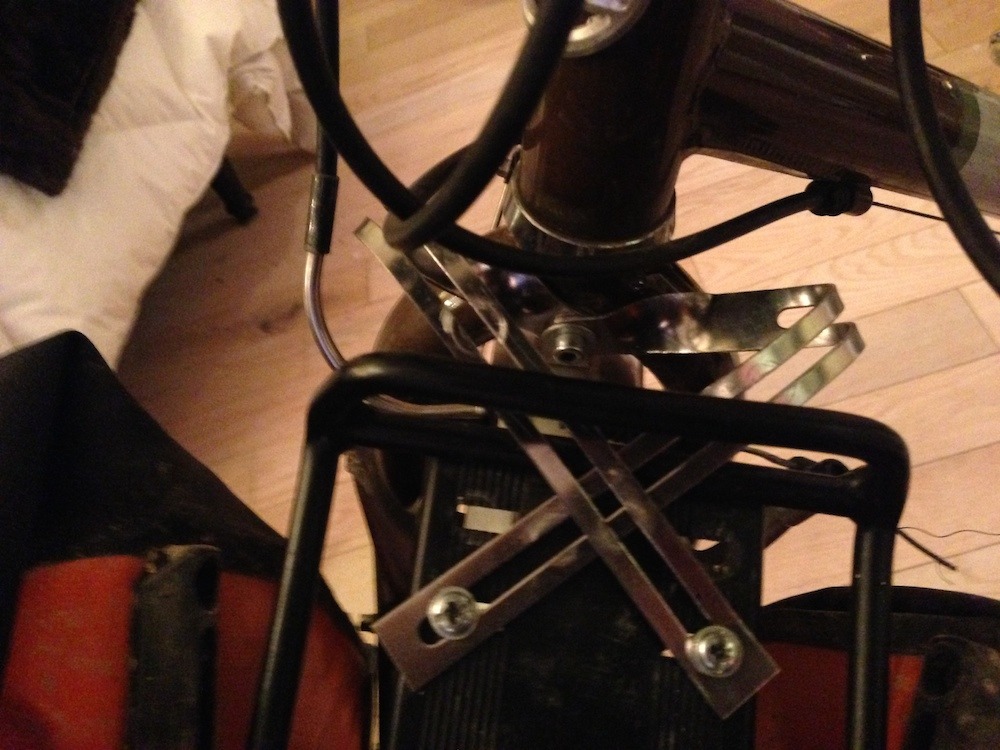
The real trick, of course, is how to mount it. For the moment, I used the hardware that I used on the rear and nothing more. In order to get enough clearance for the brakes, I needed to mount the braces on the top rather than the bottom of the rack. I also had to bend the holy hell out of them, but the crossing action seems to provide a sturdy mount via the upper fork.

bottom mount of front rack

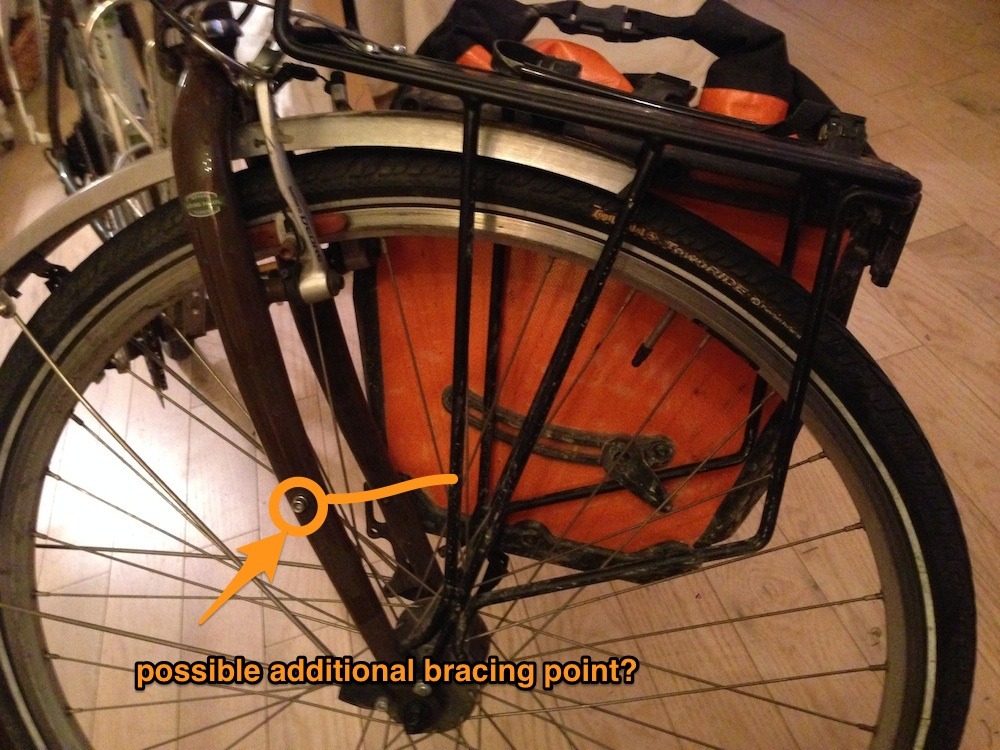
The bottom of the rack attaches at the mount point at the bottom of the fork. Because there’s an additional brazon relatively close by, I can foresee bracing the whole thing with a cross beam… perhaps even using two water bottle cages to get a little extra function, so long as it gives actual structure.

I took the bike for a quick spin in the snow today with my 9 lb city lock bungeed to the top platform to see how it felt with a moderate weight. Everything rode fine, even with the newfound oddity of having weight at that point in the bike’s geometry for the first time.

A few initial observations:

– I don’t think it’s a good idea to ride with more than 10 pounds on this current system… those mounting brackets probably bear weight differently than when on the rear, so the flex of a heavier weight could muck things up.

– I can fix that with a secondary bracing like I mentioned above. It will probably mean using some P-clips to attach the rack to the brace, and then the brace would fasten at the mid-fork.

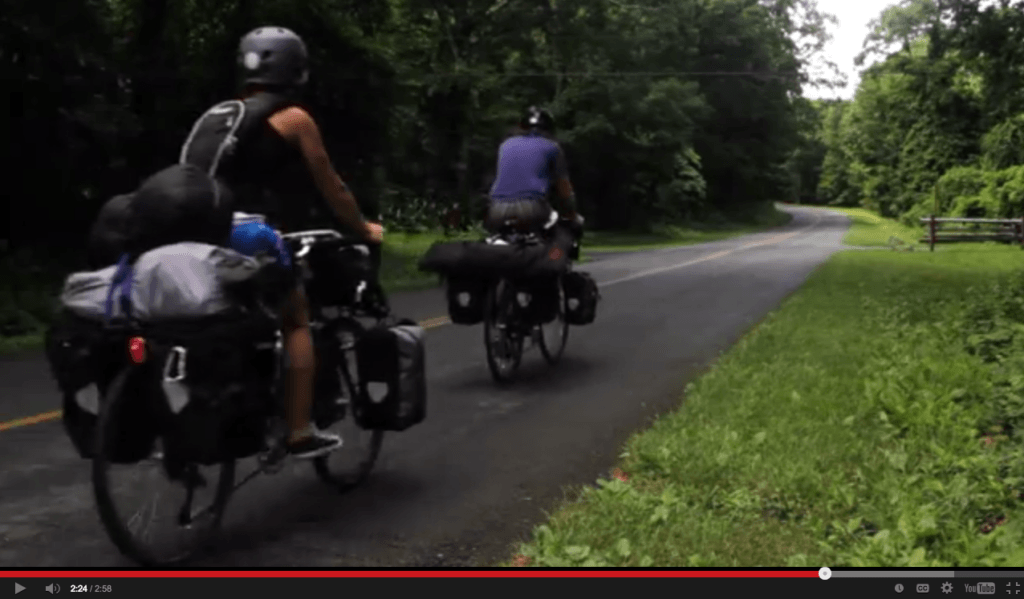
– I’m back and forth on using the platform or getting front panniers. I think the panniers riding lower would help distribute the overall weight better, and I did just save about $50 on a rack, right? That said, a dry bag bungeed on the platform (like this, although he attached front panniers too) would probably do the trick too… again, I’m not too cheap to get these things, but why not save a few bucks if form and function are served?

More to come on this project. What kinds of hacks have you been up to lately?


*1 metric crap-ton = approximately 40 pounds
do not do this with your map

Get a map holder

A little advice courtesy of Adventure Cycling… get a map case to keep yourself from being like the gentleman pictured. It keeps you organized and not all crashed on the side of the road.

I have one integrated in my handlebar bag, but there are literally dozens of types. I’ve also seen people use clips for cue sheets as well. No matter what, don’t be “that guy” or “that gal”  whipping out your map on the fly!

How to tour more by renting your space

One of the key parts of PedalShift is trying to answer the question: “how can I tour more?”. For most, the major barrier is time, with money coming in a close second. I’ve found a partial solution that works for me, and I’d like to share it – renting my space out to vacationers while I’m not using it.

It’s not a revolutionary concept, of course… it’s not like I invented renting my space out, but it manages to neatly fit the touring lifestyle. First, it generates revenue that can supplement income, which may mean you can work a job that provides more time off or increases the amount you make as a self-employed business owner or consultant. Second, it takes advantage of an asset you control but don’t use while away. It’s kind of a win-win.

For some, doing this only while you’re on tour or otherwise out of town (business trips? holidays?) can generate the kind of income that means the difference between camping in thunderstorms and splurging on a hotel. That alone is a great justification. For others, if you have alternate accommodations available (significant other or family nearby? an opportunity for a mini tour? a camper?) the prospects of opening rental of your home or apartment all year means real income possibilities. It all balances on how much of an alteration you’re willing to make to your current lifestyle versus the income you could make.

There are cons to all of these pros… but strikingly few in my experience. I’ve had a couple of odd renters, but nobody that’s done much more than make silly decisions. There’s certainly more wear and tear on my place compared to if it were unoccupied. A lot of people ask me if I ever worry about people stealing things. The service I use (AirBnB) has some pretty nifty security features included picture ID verification, and social media linkages. Most importantly though, all rental fees are paid upfront, and due to minimum stay requirements a “bad actor” would need to shell out hundreds of dollars merely to get access to my place. Plus, I get final say on any potential guest, so if I don’t have a good feeling, I can always decline the request. I haven’t had anything “walk” in over a year of rentals, and the only repairs I’ve had to make were to items that tend to be problematic when I’m around too.

I started last spring almost on a lark, and I’ve exceeded my expectations – I grossed 20% of my pretax income last year. My carrying costs increase (slightly higher utility bills, cleaning fees, plowing my driveway a bit more often) but overall the income goes right into my touring and savings funds.

The best part about all of this? I can manage it from anywhere. With a mobile device and a good working relationship with my cleaning partner, it works like a charm. More on how it all works in future posts.

When I started this site, I mashed together a word: pedalpreneur. Other than being a mouthful, it was a concept I wanted to develop and discuss in the PedalShift community… what kinds of business ideas are out there to help us tour more? What kinds of things can we do on tour itself? There are lots of examples of this… artisans who work from the road, consultants who can take calls from virtually anywhere, writers and photographers who make a living chronicling their adventures… the list goes on and on. If you work on the road while you tour, I’d love to hear more from you! What kinds of things have you learned?


pack panniers

How to pack panniers for your next bike tour

If you spend time properly planning on how you pack panniers for your next bike tour, you’ll find that’s well worth the investment. Why? It’s all about efficiency.

Pack panniers with weight in in mind

Generally heavy things should go at the bottom of your panniers. Why? It’s all about weight distribution and center of gravity. If you have heavier things higher in the bags, the center of gravity for the bike is higher, which means less stability. Pack with weight low.

Lose the bags within the bags

If your panniers are already waterproof, you might want to ditch the extra bags for the gear that goes in them. Why? It’s easier to stuff more things inside your pannier when they can fit into the shape that’s available within the bag. If your gear is already stuffed into a ball the size of a grapefruit, it might leave extra space around it. Sometimes that means for a less organized setup, but if you pack your panniers with some kind of organizational system in the first place, you’ll gain more efficiencies with how you use the space in the bag itself.

Distribute wisely

The heaviest thing you’re rolling with is probably sitting in the saddle. That means most of the weight ends up on the rear of the bike. That’s fine. It’s designed that way. That said, try to move some of the weight to the front and you’ll take some of the strain on that rear wheel, plus get some added stability on your ride. Don’t have a front rack? Consider a handlebar bag. At least pull some weight up front and you’ll find some benefits.

Adventure Cycling and America ByCycle made this great video on how to pack your panniers for bike tours. Great stuff:

mapping

Four resources for mapping your ride

Last night was all about tour planning. I use a few tools when planning a trip:

Adventure Cycling Association maps – I like the detail, planning and thought put into these. They are pricey, so take look on eBay or even Craigslist to see if someone is reselling their set, or consider becoming a member of ACA to get a discount and support their efforts.

Google Maps – If you haven’t tried out the bike route feature on Google Maps, it’s a teriffic resource. Word to the wise: it’s far from perfect. Sometimes Google routes you way out of your way to favor bike paths and trails, and sometimes it puts you on roads that are flat out bad ideas (hello Highway 9 in West Virgina!). Still, this is a great way to deviate from established routes.

Crazy Guy on a Bike – Warning: this site will pull you in, trap you and keep you there for hours (but in a good way). For years, this has been a repository of bike touring routes, and a great way to get first-hand stories on how the roads treated the author and his or her group. The site’s design will force you to remember what websites looked like in the late 90s… a serious throwback. Amazing information.

Other people’s stuff – blogs, message boards, e-books, routes using mobile phone apps… the list goes on and on. Google terms related to your route and get ready to sort the wheat from the chaff. There’s a ton out there.

I’m working on a hybrid ride of the Lewis + Clark and Northern Tier routes by the ACA, linking by a “short cut” from Missoula to Great Falls, MT mentioned in a book by Tod Rodger. More to come on that.

What resources do you use? Have you found anything else to be particularly helpful? Do you recommend anything in particular based on your experience?

map deck

Dreaming up the next tour

If you’re like most readers of PedalShift, you’re in an offseason for touring… after all, it’s winter in the northern hemisphere. While many can handle the cold of winter, it’s the incredibly short days that often hamper tours or even simple weekend bike/camping adventures. Winter for many (not all, of course)  is more about dreaming up the next tour. And that’s where I am right now.

I’ll write more about this in coming weeks, but I’ve fashioned my work life in a way that allows me to spend at least a few weeks to a few months per year working on the road. Last year I experimented with a combination of mobile tech and on-bike energy production to allow me to be productive while I was on the road between Portland and San Francisco. This productivity allowed for a longer tour. I learned a lot, and have a few tweeks to make to the system (again, more on that in future posts).

But winter is more a time to dream up what’s possible with the route. So, here’s a couple of trips I’m hoping to make:

DC to Pittsburgh via the C+O Canal Townpath and Great Allegheny Passage

Sometime this spring, I’m looking at a 6-day trip to finally complete the well-traveled C+O/GAP combo. I live most of the year on the DC end, and my early bike tours were almost exclusively on the C+O. I friend from San Francisco is coming out this spring – time TBA, but almost certainly after Daylight Savings Time begins, the temperatures rise and the trails dry out a bit. We also need to wait until  Big Savage Tunnel on the GAP opens, which isn’t until the first or second week of April.

Portland, Oregon to Somewhere in North Dakota via the ACA Lewis + Clark Route

This summer, I’m planning on embracing the heat rather than fleeing from it. For the past few summers I’ve biked while enveloped in the Pacific coast’s cooler temperatures. It’s time for something different, and I’ve always been attracted a reverse route of the Lewis + Clark expedition (starting in Portland rather than the coast due to logistics more than anything else). There’s the added bonus of getting to roll through North Dakota, my elusive 49th visited state. Start would likely be sometime in mid-July and I am looking at hopping on the train back to DC to help transition back from tour to reality.

I’m neck deep in details and maps, and after too many weeks off the trails and roads with a fully loaded bike… I’m starting to get that excitement back.

What kind of tours are you dreaming up? Are they new experiences or repeats of well-loved routes?


image credit: “stacked deck” by fluidthought 

grand canyon

… and we’re back!

Looking back, I think I see the first few months of pedalshift as a beta release… the ideas were all there, but it needed a bit more time in the lab, at least from my perspective. The hiatus was helpful in shaping that, largely because I wasn’t terribly focused on bike touring so much as I was working from the road.

Most of the fall I was out and about with Tranquility Tour. We traveled 11.500 miles over the course of several months traveling to over 20 events related to the launch of Tranquilologie (the latest book authored by my better half, for those who don’t know). We did all of the traveling by RV, which was a wholly different experience than traveling by bike. On one section of the trip, we mirrored portions of my summer bike tour, and it was interesting (or perhaps offputting) to drive several days worth of the bike route in a matter of hours. I realized how much one misses when traveling faster than you can pedal because I knew what we were passing at 55 mph.*

So, in 2014 pedalshift returns with the same basic ideas… bike touring meets lifestyle, particularly in ways that allows for more bike touring. How can we work from the road to enable longer tours? How can we live a more sustainable lifestyle to support more time to be on the road? I’m hoping to have a post per week exploring these ideas, and I’m also hoping to create a community where we can collectively share all facets of the bike touring lifestyle.

—-

*I did see a handful of bike tourists out on the trip, and I have to say I felt a lot more affinity towards them than the others driving RVs.

Route and pacing lessons on the Pacific Coast tour

20130806-194459.jpg

Continuing the series on post-tour takeaways… Some thoughts on the route and pacing for the section of the Pacific Coast route.

There’s little to quibble about with the route that the Adventure Cycling Association uses… It’s challenging but not overly so. I keep mentioning “the book” which is Bicycling the Pacific Coast… It’s worth having, but bear in mind its latest revision is 12 years old, and there’s some changes since the last writing (duh).

– I recommend deviating from the set schedule when possible, if only to break up the logjam of riders you encounter here and there.

– The mile markers in the book are wrong in a few spots, none more important than on Rockport Hill. Rockport is the hill after Leggett (the highest point on the ride) and is much steeper and – in my opinion – a trickier challenge then Leggett due to steepness and the fact it lies after a long descent and the cold legs that brings. The mile markers are a full mile off… So when you think you’re nearly done, there’s a serious mind game that happens… Rider beware 😉

– I recommend a different mileage split late in the tour… Rather than do 40 miles from McKerricher Beach (near the amazing Fort Bragg) consider going all the way to Gualala. The county park on the south side if town is far superior and the next day’s tougher-than-advertised trip to Bodega Dunes is better as a 40 mile day than a 60 mile day!

– Pacing: this is total personal preference… You’ll see people zoom past you from time to time, but bike touring is rarely a race. Go with the flow and what your body and mind are telling you. This trip, I focused on comfort and energy conservation, so I downshifted frequently and rarely pressed into my pedals or got out of the saddle. I enjoyed the ride… even the climbs… a little bit more, even if my speeds weren’t always efficient.

These are all just my takeaways – there are do many ways to rock a bike tour, and there’s no right way. Tomorrow I’ll chat a bit about the first person to rub me the wrong way on tour and why his “there’s only one way to do it” attitude contributed to his title of being the only bike touring “Lance” I’ve ever met…