On this episode
Why I’m lukewarm on trying Warm Showers… Travel Insurance and why you may want it…The final tally – did I make money on my Pacific Coast tour?
hey, it’s the direct download link for episode 007! (mp3)
Big congrats to Sprocket Podcast on their 200th episode. We have a ways to go for a monthly(ish) show to roll the odometer that much around here!
The Journal
Next tours…
TransAm?
3 months(ish)
Circumnavigating Lake Ontario?
9 days
Pittsburgh-DC (for real this time)
5-6 days
Hoping to find time for some weekend ones this fall, maybe some S24Os? Maybe some winter riding and camping? Happy to be home and connecting with loved ones now.
Accommodations + Warm Showers
I run into a lot of people who love Warm Showers and couch surfing
The price is right… free and sometimes bartered work
Why am I lukewarm?
I’d feel obligated to be social when I might not be in the headspace
I like my own space and I’m willing to pay for it
I meet people in other contexts where there isn’t a layer of quid pro quo
I realize my hesitations don’t really match others experiences!
What’s your Warm Showers experience like? Are you all in?
The Lab
Insurance?
Your coverage may not work outside of your region, and almost assuredly outside your country!
Learned I took a bigger risk than I thought in Canada
Supplemental travel policies are (often) insanely cheap compared to the potential risk
Experiment: finding a good supplemental provider or see if notice to my insurer is sufficient
Complication: Extended to insuring against theft, etc. can muddy the waters
Resources:
Insurance for bicycle tours (Traveling Two)
Long term cycling insurance (Shane Cycles)
Pedalpreneur
- The final tally!
- Total adjusted rental revenues – $5094
- Total tour expenses (including cleaning fees for cabin, additional iPad charges, etc.) – $2929.77
- Miscellaneous cash expenses – approximately $200
- Total “profit” for this tour was $1964.23. Not bad!
- Interesting discoveries:
- I spent *way* more than I thought – would have guessed $500 less
- 5 hotel nights = biggest tour expense after cabin cleaning costs
- Expenses were very back ended in the tour, as expected
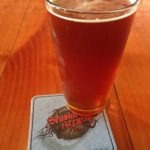
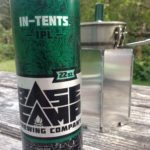
- I visited a lot of places with “brewery” or “brewing” in the name
- Safeway and Starbucks got the most repeat visits
- I’m still ticked off the ants got my pie from Simply Pies in Santa Barbara
- Lessons:
- When you aren’t worried about controlling costs, you will spend like a drunken sailor
- I don’t regret many purchases because each one has a pretty fond memory (which is worth more than the purchase)
- I got way more out of $3000 spent on an experience than a $3000 consumer good
- I’m really fortunate to be able to have this opportunity – but if I can do it, I know others can too
Connections
Hugo!
thanks for the mail…wel i left the usa…i am now in thailand,until the end of september,wil work until the end of januari.
after 4 months of working wil leave for…i dont know yet.
take care and maybe see you again,hugo
Thanks to Scott for mentioning Pedalshift amongst some big names – very honored!
Thanks for the feedback on Episode 006’s interviews with my fellow tourists. I hope to do a lot more of that. Speaking of, we got our first iTunes review and it was a happy five stars…
Finally!
by Two wheeled tourist
So excited to hear a cycling podcast geared towards touring. So far this podcast seems promising, picking up where other rando/touring shows failed. Looking forward to new episodes! Would love to hear interviews with frame builders and people like Jan Heine of Bicycle Quarterly or other journalists and bloggers who specialize in this area of cycling!
Subscribe + Connect
Hey, The Pedalshift Project is on iTunes (we’ve even been featured in the Outdoors section already!) but if you like you can use your favorite aggregator (like iCatcher on your iPhone for instance), with old timey RSS. Email me at pedalshiftproject@gmail.com – I’d love to bring more voices to the show!
Music
The Pedalshift Project theme is America courtesy of Jason Kent off his debut album. Check out his band Sunfields‘ new release, Habitat, including this track, wherever cool music resides: